The final coat is now on the lounge room, so it looks like this (sorry, no pics in daylight yet):
That's the view I've been showing you a lot of, looking towards the front of the house. That darker area to the left is the little entry-way where the fancy window lives, with our piano currently keeping it company. That will eventually become the ensuite. The little doorway that you can see a glimpse of on the left is the door to the master bedroom. I really need to do a proper tour post of this house, don't I?.
If we swivel to the left, this is what we see now:
The doorway to Daniel's room on the left, the doorway to the master bedroom on the right. And yes, you can see a little white bedframe peaking out of there along with the side of one of our wardrobes. I'll talk about that bed soon-ish.
Swiveling to the left again, we see this:
Not the loveliest view I know, but once all the junk (and random bathtubs) are removed, it will actually look more like a lounge room looking toward a dining room.
And swiveling for the last time towards the left, is this:
That is the doorway that currently leads out to the L-shaped sleepout. Eventually, that will be the door to the home office. Tom isn't a permanent fixture there, in case you were wondering.
It still amazes me how much of a difference a second coat of the wall-colour makes. The solidity and depth of the colour really changes with the second coat. It suddenly looks like a real painted wall! Duh!
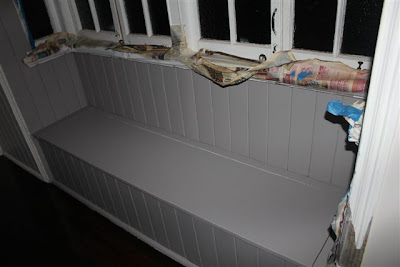
While we were at it, I gave a second coat of paint to the bay window alcove in the master bedroom. When I bought my Alley Cat ceiling paint from Bunnings, I asked the girl to explain to me what the difference was between wall paint and ceiling paint - why I had to buy a different type to paint on the ceiling. First she looked at me like I was an idiot, and then proceeded to explain (not particularly intelligently herself might I add, so I'll paraphrase) that the formula is different so that the ceiling is a very flat colour (i.e. absolutely no shine at all), while the wall paint is designed to be more washable.
I didn't want to have to buy two different 1-litre tins of the colour, so I figured I would just paint the walls of the bay window alcove in the same paint and see how we went. Which I did.
I'd only used a tiny bit of it to paint my sample cardboard, so I decided to use the rest of it to give a second coat to the window alcove, because it's wall paint. And there's very little difference in the colour between the two brands after all, by the looks of it! It's probably a tad lighter. You can't really see in the dark.
Like with the lounge though, a second coat made a huge difference to the finish. I like it. I like it a lot!
So what's left for the painting? Daniel's ceiling, the kitchen ceiling, and the final coat on the dining room, and we're done for the moment! Of course I see LOTS more painting in our future... our kitchen cabinets, our bathoom vanity (and our bathroom ceiling for that matter), not to mention the fact that our many many windows need a lot of TLC. Oh, and our new dining table! And don't even get me started on the outside of the house. Take a deep breath. All in good time, all in good time.


Beautiful colors! Love the windows and trim areas above the doors. Just lovely.
ReplyDeleteAs for the paint lady, she crazy. As long as you paint flat, there's no reason you have to buy ceiling paint.