DIY Explanation

pour améliorer, meaning 'to improve', is a humble record of our renovation, home improvement and landscaping projects, with our travel adventures thrown in.

29 March, 2013

Big Announcement

Guess what everyone?

We've been keeping a secret.

A really big, life-changing secret.

No, we're not pregnant.

But we are getting a new baby, of sorts!

We're buying a new house!


Meet our new baby.


And as you can see, our new baby has been pretty neglected.


But we are completely in love.


Hang on, what about our current baby, you may ask?


Well she doesn't need us as much as she used to when she looked like this.


Oh and perhaps more importantly, in case it isn't obvious, we're suckers for punishment.

Yes, we know we're completely crazy to have spent every spare moment for the last two and a half years pouring our love into a house, only to leave it for something in even worse condition, and just when we could have started enjoying the fruits of our labours where we are.


But the simple fact is that we always knew that our current house wasn't going to suit us in the long term, particularly when we eventually decide to start a family, so this move was inevitable at some stage.

And we just can't pass up this opportunity. It's on a beautifully large (with development potential), elevated block of land only a few blocks away from our current house, so we know we already love the neighbourhood. The house itself is old and run-down, yes. But it's solid and in original condition without any awful 1970's renovations that would have ruined some of its character.


And wouldn't it be a shame to waste all of the renovating skills we've developed over the last couple of years without having an outlet to use them anymore?


So who would like a tour of the inside?

The pictured furniture all belongs to the current owner.

Lounge room, with dining room in the upper right, and the little front entry to the left of that. Both the dining room and the entry lead straight on to the front verandah.


Please forgive this awful photo. The electricity had been cut off when I took this one, so I was relying entirely on natural light. This is the other wall of the lounge room (the one on your left in the above photo). Hello TV wall!


And here's the little dining room with the weird off-centre pendant light.


And now brace yourself.
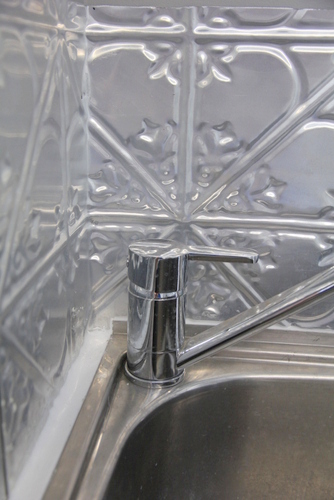
The kitchen.


I know, I know. It's awful. But hey, I coped for over a year with no stove-top and just a single electric frying pan. I'll manage.

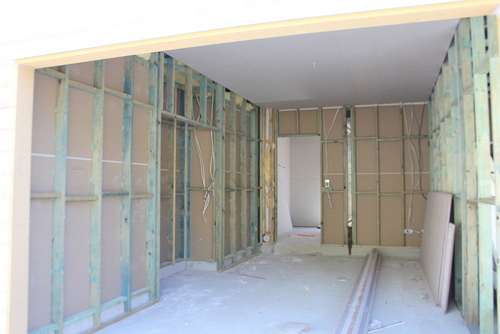
Here's one of the sleepouts. The French doors you see there are the ones that were visible from the lounge room. We're thinking we will turn this into the kitchen and knock out the French door wall between it and the lounge room so it's nice and open.


Here's the master bedroom. It's huge, which isn't particularly obvious with the bed in that weird diagonal position.


And here's the other sleepout. Hideous, I know. The main living area and bedrooms are flanked on both sides by enclosed sleepouts that were probably originally wrap-around verandahs. I'm seeing walk-in-wardrobes and ensuites.


The little section of yellow wall (why is it that we can't seem to escape yellow walls???) you just get a glimpse of in the top of that above shot will be my office. It also has a separate entrance off the front verandah.


And now are you ready for the worst part?

The bathroom.

It's bad.


It's actually got a fairly nice grey terrazzo floor, but do you see all of those yellow tiles? It's not like you can miss them. Well they're not actually tiles. They're just laminated fibro board that is supposed to look a bit like tiles.

Now do you see that weird spotty brown section of "tiles" above the bathtub?

Well that's where the board is deteriorating and peeling off, meaning that if you try to have a shower in there, you'll probably end up with water pouring straight inside the actual wall cavity. Not ideal. Not to mention the fact that I'd be afraid to touch it with my bare hands because it's probably slimy and gross.

Needless to say, when we move in, our first priority will be to make the bathroom a little less disgusting.

Before we get there though, we've got a few crazy weeks ahead of us. Not only do we need to prepare ourselves to move house again (always fun), but we need to get the upstairs area of our current house ready to rent out. But not only ready to rent, ready to sell in the future, so it has to be perfect. We're really pushing ourselves to our financial limits to buy this new place, so we are probably going to need to sell our current house at some stage (hopefully when the market improves) in order to take a bit of pressure off.

So, we've got a giant to-do list, and a settlement deadline looming! There are a few late nights in our near future, I can tell you that!

Our kitchen cabinets still need to be painted...


Our lounge and dining ceilings still have paint peeling off the panels that haven't been replaced, and our verandah ceiling has a whole bunch of exposed seams between ceiling boards that have seen better days...


Every door, architrave, skirting board and window in the house (upstairs) needs to be sanded, possibly even stripped, and painted...


And then, of course, there are about a million little jobs. Like repairing the fourth claw foot on the bath that snapped off two years ago, getting a whole bunch of light fittings installed, putting knobs on the master bedroom wardrobe doors, attaching skirting boards to the laundry and the bed 2 side of the wardrobes, painting the front steps in the same colour as the house, replacing the ratty old board above the bathroom door with something attractive like glass, not to mention actually progressing with the upstairs side of the front yard beyond this point...


There's a lot to do. And we've got only a couple of weeks to do it, while holding open houses to get the place rented!

Wish us luck! What do you think? Are we off the charts crazy? Or just a little bit?

28 March, 2013

No More Combat Rolls Required

Okay! Back to the front yard again!

We really need to address the fact that our little wire dividing fence requires a combat roll in order to actually enter the downstairs front yard, and even that access will disappear when we install a couple of rails at the bottom there.


So... how to solve that problem?

Well, fortunately we were clever enough to plan ahead when we first built our front fence. See how there are two posts very close together on the right end in this photo? Well our current front gate is to the right of that right post. The future downstairs front gate is to replace the fence palings between the second close-together post and the next one over to the left.


This shot when we had temporarily removed the big fence panel displays it better. The two gate spaces are easily visible, with the little tiny bit of fence panel between them, where the dividing fence joins the front fence.


So what to do? We didn't have any spare fence palings leftover to make a second gate, and the existing gate wasn't made with the original fence palings anyway. It was one we bought cheaply on Gumtree and just painted white. So, in the interests of getting some symmetry, we decided to make two brand new gates that would look exactly the same.

And we decided on pickets!


Which I painstakingly painted white (actually they look white, but they're really 1/8th strength Gunnard Grey). We went with pickets because I have a plan to one day re-build this fence. When we first built it we just recycled the old timber battens that used to live underneath the house, so all of the palings are a bit too twisted and warped for my liking.

We managed to find another steel gate on Gumtree that was roughly the right frame size, and we recycled the steel frame on the existing front gate, so we had two. Then, Tom got to work screwing all of the palings into the steel frame, with his trusty supervisor looking on closely.


Although her supervision became a little disruptive when she decided that it was time to play ball with her hardly-recognisable rope toy.


Which she then supervised very closely as it got itself wrapped around Tom's drill.


Love that girl. Anyway! Despite the interruptions, Tom did manage to get both gates completed, and then it was time for installation!


And voila! Magic! Two matching gates!


And the view from the other side of the upstairs gate...


And the view of the other new downstairs gate... 


Not bad, huh?


For now, although I think I still plan to replace the flat-topped fence palings with pickets in the future, I quite like the fact that the gates look different from the rest of the fence.


So that's that! The downstairs area of the front yard is now officially accessible! I think I can even comfortably call it finished! Woohoo!


Wait a minute, does this mean that the entire downstairs area is complete? I'm going to say yes! Although there is one more gate-building exercise we need to go through in order to enclose the two garage spaces, and of course there is no shortage of jobs remaining upstairs... stay tuned!

18 March, 2013

Put Tin on It

I think that "put tin on it" might just be our new catch phrase around here.

We've put tin below our downstairs kitchen bench.


We've put tin below our upstairs kitchen bench.


We've put tin above our upstairs kitchen bench.


We're planning on putting tin above our upstairs laundry bench.


So why not above our downstairs laundry tub, huh?

But first things first. Surprise! We now have a downstairs laundry! If we rewind a bit, see this old not-plastered-yet photo of the garage? The recessed area to the left is the laundry.


And here it was after plastering (and after the height of the floor was raised).


Then we painted the whole garage grey...


After which the carpenter framed out the little laundry nook opening properly with timber trim...


And then we were left with a bare opening. The flooring guys had left a little pile of bamboo floorboards behind when they finished the internal floors, so we decided to cut them to size and add them to the floor of the laundry nook ourselves. Unfortunately it didn't occur to us to do that before the laundry tub was installed, so we had to fit them around it much as we could without disturbing the plumbing fittings inside it.

The laundry tub itself we bought secondhand for $100 rather than buying a new one for over $200. It's in great condition, so why not save the little bit of extra cash?


And... we put tin on it. Actually, we put tin above it. We just managed to scrounge enough of an offcut after covering all of our other tin areas to wrap a little section around the corner.


And I sweet talked our tiler into silicon-ing the gap between the tub and the tin so that we wouldn't get any stray drips down the wall. Not bad, if you ask me! 


But we weren't quite finished with this little space yet. We had a few secondhand cupboards leftover from our downstairs kitchen and upstairs laundry fit-offs, so we figured we might as well pop a few in the little downstairs laundry for some storage.

Tom used his stud-finder to measure where we could screw the cabinets into the wall and actually have their weight supported...


And then set up an extremely sophisticated support system to temporarily hold the cabinet in place while he screwed it into the wall. If you ever want to replicate this support system yourself, Plasma TV and coffee machine boxes (which we borrowed from the new tenant) do the job remarkably well.


We had three little leftover cabinets in all, but unfortunately the laundry nook was just a little bit too narrow to sit them each side by side. We thought about every possible configuration to include all three, but just couldn't manage it. And we wanted to leave vertical space for a dryer above the washing machine, so we left it at two cupboards.


We're quite proud of our little laundry nook! And considering that the only things we actually had to purchase for it were the $100 laundry tub and a $25 mixer tap, we can't complain about the cost!

What do you think? Are you jealous of our tenant?
Related Posts Plugin for WordPress, Blogger...