DIY Explanation

pour améliorer, meaning 'to improve', is a humble record of our renovation, home improvement and landscaping projects, with our travel adventures thrown in.
Showing posts with label Verandah. Show all posts

06 May, 2013

If we never see another celing again...

Yes, it will be too soon.

Until we get to our new house, at least!

In the interests of speeding up this chronicle of our little house's renovation so I can finally start talking about the new house, how about I condense about a week and a half's intensive work into a single blog post?

Sound fair?

You won't know the half of it. Try to feel our pain anyway, ok?

So the ceilings...

Remember when the builders replaced some sections of the ceiling in our lounge and dining rooms that were in awful condition?


And then my brother Daniel hopped up on a ladder and did a bit of puttying and undercoating so that they would look semi-normal again?


Well we've always known that that was nowhere near the end. Because some panels still looked like this.


Yes, that's paint peeling off. And for the vast majority of the non-replaced panels it was the same. The builders couldn't care less about leaving us a whole bunch of paint scraping, sanding and patching work. They filled the brief, which was to replace the damaged panels.

So... with the knowledge that this was never going to be something we would tackle once the house was tenanted, we sighed, gritted our teeth, and got to work.

First we had to remove the furniture, in order to make a clear path for ourselves. In a small house, that always makes for a fun time, particularly in the rooms that have to absorb the overflow furniture!


And then Tom hopped up on the scaffolding and paint-scraped, sanded, and puttied his heart out. Believe me, this kind of task on a ceiling that's made of old horse-hair plaster is not for the faint-hearted. Tom had to cover almost every inch of the older boards in a layer of putty in order to get a smooth finish, in the end!


And then he sanded, which explains the curtains draped up all over the place. Putty dust is pretty pervasive stuff...

And then we could finally paint. Which was of course a painstaking process with paintbrush and roller because of all of those battens dividing up the space.


And that was just the first undercoat.

There were two more coats after that.


But it was worth it (which is easy for me to say, since I wasn't the one holding my hands above my head almost non stop for days). They look beeeeeaaauuuutiful now!

The lounge...


The dining room...


Aren't they just the smoothest, creamiest-looking ceilings you ever did see?

Yes? Good.

Moving on!

There's another ceiling that needed our attention desperately.


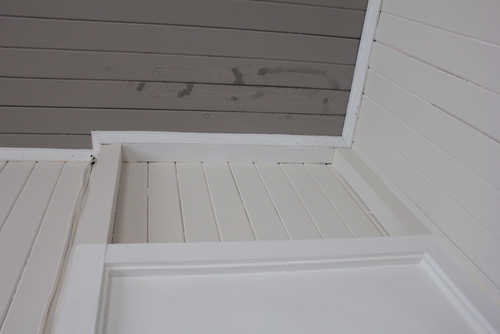
It's our verandah's ceiling (and since we're here, I might take the opportunity to take the credit for slopping a coat of grey paint on that triangular wall area above the main balcony that used to be yellow - goodbye yellow...finally!). It's made with some kind of cheap fibro sheeting, and all of the seams between the boards are clearly visible (UGLY!). Not to mention the fact that the whole thing is in dire need of a good paint.

So... you guessed it... the process began again. Sanding...


And of course, there were a few areas where the existing paint wasn't too keen on sticking to the ceiling. So there was then some paint scraping and puttying.


And more sanding. And then we gave it a good undercoat. Which I didn't take a photo of. Whoops!

But we still had the problem of those ugly seams. You may recall that our solution in my office to the same problem (those same boards extend in there) was to attach some boards (I'm going to call them battens) along the seams to create a little timber pattern along the ceiling, similar to the pre-existing ones in our lounge and dining ceilings above (see here for a more detailed account of that process).


Well guess what? We decided to do exactly the same thing on the verandah ceiling. Surprise! We took some measurements and I grabbed some boards at my next trip to Bunnings (a not infrequent occurrence), and one evening we tackled it!


Voila! Much fancier!


We managed to get some of the boards undercoated before we put them up, but not all. Makes for some super attractive halfway-through shots!


And then came a couple more coats of paint, so the whole thing gleamed with milky-white smoothness!

Except I didn't take any photos of that. Not a single one. Bad blogger.

I'll take some eventually and show you, I promise!

In the meantime, let's quickly cross to Ceiling Number Four! That's right, FOUR CEILINGS WE'VE HAD TO WORK ON!

It's the master bedroom ceiling that used to leak before we got the roof replaced, leaving some not-very-lovely watermarks on my painstakingly-chosen paint.


So I paint-scraped, I sanded, I puttied, I sanded, I undercoated, and I coated, twice more. I also tackled patching the other two areas of the ceiling where this off-centre fan and this no-longer-necessary light used to hang. That's right, we FINALLY got the electrician in to install a new fan in a central location and install my two bedside pendants. Glimpses of those to come soon.


And that's it for ceilings... for now.

Can we get a round of applause? Or perhaps a back rub? Three ceilings completely made over, a fourth repaired... what can I say, we're a lean mean ceiling-painting machine!!!!

So what do you think? Please tell me they look amazing. In gushy, over-enthusiastic language that forces me to play it cool and act like it was no trouble at all.

If not, I was serious about that backrub.

23 April, 2013

Metal Trumps Timber

We've been wondering for a while what to do with the original boring and seen-better-days front door to our house.


It doesn't really make a lot of sense to have a full-sized flat door to an open verandah, does it?


Plus, we get beautiful breezes coming down the hill and sweeping through the verandah now, and that hard door stops them all in their tracks, so we have to chock it open, which as you can see from the above shot, messes with the beautiful symmetry of that little front balcony area and offers no security whatsoever!

So, something has to be done. I've been thinking for a long time about what options we might have for making a timber gate and a smaller security panel to go above the railing to the side. Since, let's be honest, making it super easy for burglars and the like to just leap right over and into the house is not really my idea of a good time.


And even after taking a couple of little scenic drives through suburbs like Chelmer and Graceville staring at all of the timber verandahs and checking out their gates, I couldn't come up with anything I liked the look of enough.

Add to that the fact that getting a timber gate and security panel custom-made would cost us an arm and a leg, and I was beginning to despair.

And then I thought of this gate that we had made for our last house.


We had asked a local steel fabricator to make it up for us, and rather than hand-drawing a fancy one-of-a-kind design and then hand-making everything, he bought pre-made decorative panels and then welded them all together for us. Much cheaper!

At first I immediately dismissed the idea of putting a steel gate on a timber house, but the more I thought about it it made sense! It would let air flow through beautifully, and the black colour would play off all of the other black trim on the house and even the little stained glass window. And, of course, it would look amazing!

Tom loved the idea, so I decided to borrow the steel guy's big brochure of pre-fabricated panels and muck around with possible designs.

In fact, I photocopied all of the relevant pages and then cut out the bits to play with them. Yes, I'm insane. Get over it.


It didn't take me too long to figure out that this had to be one of the most inefficient ways of designing something EVER. Particularly since the little pictures of each panel in the book weren't necessarily each in the same scale, so some panels that were smaller than others were actually pictured larger. Nightmare.

So I turned to my computer, and resized everything appropriately to muck around with it. Can't believe I didn't just do that first.

Anyway, this is the first option I came up with. And I loved it. But I had to take a step back. Given that in the beginning I didn't even plan on going for a wrought iron look, this design was upping the ante quite a lot. It would take eight of that main swirly panel plus others (translate that as $$$$), and in my opinion it was just a bit full-on. Too tizzy for this house.


So back to my virtual drawing board!

This was attempt number two. And as a more roomy (and therefore less tizzy) option certainly had the makings of a winner, but it wasn't quite wide enough to fill the full door space, and I couldn't figure out how to make up for that without adding weird squishy bits in the centre.


So we called the guy over for a proper meeting (and a measure-up of the space). He and I mucked around with various options, including putting an extra border around the edges, which I didn't much like. The option we eventually settled on was to add little straight pieces on the tops, bottoms and sides of each fancy panel, to widen the whole thing so that it would fill the frame size without having much visual impact. The same for the smaller security panel.


So with that plan in mind, I waited impatiently for him to order in the panels, weld it all together and then get it painted.

And a few weeks later... it has arrived!!!


This is my favourite kind of house job. Minimal physical exertion on my part but heaps of creative input, and then it's like you snap your fingers and the work is done! Oh, but then you get the invoice. Perhaps not my favourite.

But since you don't have to pay the invoice, you just get to enjoy this "voila, like magic!!" moment...


What do you think? Don't they look amazing?


I prefer this view.


And as you can see, they play beautifully with the stained glass window and its little black window-sill.


From the street they're not super-obvious, which isn't a bad thing in my opinon, since it's not immediately obvious that we've added tizzy metal bits to our all-timber house.


But then again, they look amazing, so who cares that we've added metal bits, right?


Someone else is particularly enjoying the ability to personally greet each visitor to the door. She's such a lady. As you can see, I've attempted to preserve her doggy dignity.


 My three favourite things in the world!!!! Doggy, fancy new gate, oh and husband.


What do you think of my new gate? Is it sacrilege to put a metal contraption on the front of an all-timber house? Or have we got away with it?

01 February, 2013

Practically Naked

It's alright, don't worry. I'm not going to strip.


I did neglect to describe the event in detail when our house did, though!


I speak of that momentous day when the front of our house not only got some long long long long long overdue paint slapped on, but had some fairly major walls/windows stripped off!

Enter our sleepout, as it was.


In fact, that's the remarkably clean, junk-removed shot of it not long before I threw that crummy brown falling-apart dresser out the window in preparation for the carpenter to come and start work.

The other side of the room was looking less tidy, holding a whole bunch of light fittings ready to be installed downstairs.


I wouldn't call it much of an improvement from this shot taken before we even moved in.


But this room has never really made much sense as an enclosed sleepout. It has suited us incredibly well as a store room, though!


This house would almost definitely have started out its life with a lovely open verandah at the front, and our intent has always been to bring it back to that former glory. So, while the painters were busily working away removing all traces of yellow on the front of the house, the carpenter started the very quick work of removing the ugly windows and walls.


Voila! Verandah!


Allie particularly enjoyed her new uninterrupted view of the entire neighbourhood.


Love that beautiful girl.


The removal process was repeated on the other side near the door at the top of the stairs...


And the next day all of the balustrade went up.


We replicated the handrails we built for the stairs, with one rolled hand rail at the top, and then the railings themselves between two flatter top and bottom rails, separated from the top hand rail a bit.


I know it's a cliche, but it opened things up so much! Not just literally, since of course without walls and windows the space feels more open, but it feels like the amount of space has doubled! Hooray for giant verandahs!


We do have a few concerns about this new open area to the right of the door, since someone energetic could probably just vault straight over it, making it a bit of a security worry. We're working on a plan to enclose (but without actually enclosing) that area above the railing though, so stay tuned.


In the meantime, you've already seen it, but how good does our new verandah look all painted white?!


Love love love love love love love it! And we get the most amazing breezes coming straight through the door at the top of the stairs. It's a wonderful place to sit in the evenings. You'd think the house was designed that way or something!
Related Posts Plugin for WordPress, Blogger...