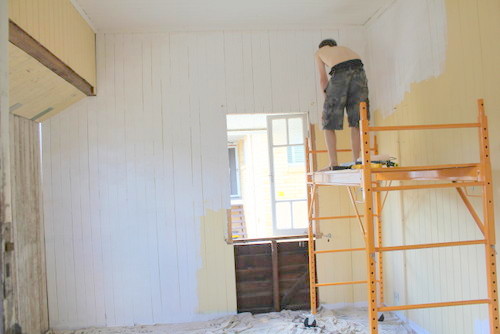
As you may have guessed from the shortage of blog posts lately, I've been having a bit of a renovation motivation slump. Renotivation Slump? Tom's away with work at the moment meaning I'm tackling jobs on my lonesome (with some support from my brother Daniel), so things that used to look totally DIY-able look slightly more overwhelming when I have to tackle them alone!
What I have been doing though, is a lot of thinking!
My musings over tiling choices and shower curtains for the future downstairs bathroom (see
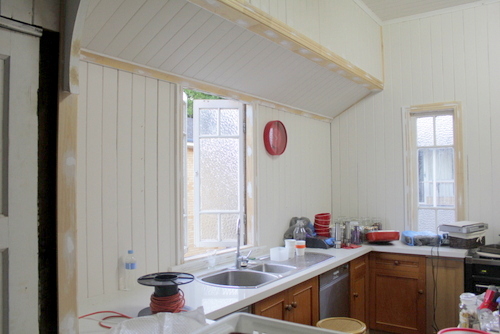
here) were just the start of it. I'm still thinking about the bathroom, but in the meantime, I've moved on to the downstairs kitchen, which currently looks like this.
I spent a bit of time just standing in the room thinking about what we could do, and had an idea that it might be best to have floor to ceiling cabinetry along the back wall (the one where that work bench is in the photo above) for lots of beautiful storage. Although that wall of cabinetry would need to include space for a fridge, wall oven and microwave as well, so there might not be all that much space left for actual cabinets. Worth a shot though, right?
Since we managed so well finding a secondhand kitchen for upstairs for a bargain price (including the a clawfoot bath and beautiful Smeg oven, see
here), we had always thought we would probably try and find something similar for downstairs. So of course, I went Gumtree trawling! I didn't like my chances of being able to find suitable floor-to-ceiling cabinetry, but then I stumbled across this!
Lovely timber doors (that I would of course want to paint over - sorry timber lovers), very tall floor to ceiling cabinets, plus another freestanding pantry cabinet and wine rack...
Sink included...although it would be the first thing I'll get rid of...
Nice big pot drawers...
And a timber beadboard back to the peninsula.
I immediately contacted the seller and asked if she could send me measurements for everything, so I could play around with how it would all fit in our little space. They came back with this beautifully detailed diagram...
At which point I took the diagram and my tape measure downstairs and immediately started marking out where things might go with pieces of scrap timber.
I very quickly realised that there was no way we could include everything in its entirety, or we ended up with hardly any space left in the room for the lounge.
The kitchen was listed for $1,500, but I bargained them down to $1,000, and over the long weekend, Daniel and I set out with the ute and as many blankets as we could fit behind the seats to collect it.
Four hours, $1,000 and a heavy game of tetris later, we returned with an extremely tightly packed ute and sore muscles. Now downstairs looks like this.
Certainly not much of an improvement yet, but I'm working on it.
I was trying to figure out how I could easily play around with the placement of the various cabinets to figure out where they should go. In theory, the easiest way would simply be to put them in place, piled on top of one another if necessary. The problem with that is that some of the doors didn't come with cabinets. In fact, if I refer you back to this picture, you can actually kind of see that the tall doors on the left and the high cabinets are all built into the wall rather than having free-standing cabinetry. This meant that I would need to have eight arms (and be a few feet taller) to be able to actually hold all of the doors in place to see how they would fit.
And then I remembered that John (of blog
Young House Love) once did a bit of a review of a few different kitchen modelling programs, so I decided to see what he recommended. He compared
Floorplanner.com,
Ikea’s Kitchen Planner and
Google Sketch-Up (see
here for the full post) and had good and bad things to say about all of them. He was most interested in being able to render things in 3D and be able to see how a doorway between their kitchen and dining room would work.
I had a quick attempt with
Ikea's Kitchen Planner but gave up when none of their IKEA-only cabinets matched the sizes of the cabinets I was working with. I then I got as far as downloading
Google Sketch-Up and attempting to create a rectangular room, before giving up and realising that all of these programs were way too sophisticated for what I was looking for. I just wanted to be able to create two-dimensional boxes that were exactly the right size to match each of my cabinet doors so that I could then move them around in different positions along the wall to see what would work best.
And then I had an epiphany. How about good old
Microsoft Word?
I opened up a new document, and decided that in order to create a 3670 x 2600mm wall and still have it fit on a single A4 page in word, I would multiply each measurement by 0.005. That gave me a measurement in centimetres that I could easily use in Word that still fitted on the page. I probably could have gone larger (i.e. by multiplying by 0.006), but I wanted to try and keep things as simple as possible for myself, and since 0.005 worked, I stuck with it. I marked in the doorway on the left, and I was ready to start planning.
All I did then was create a series of text boxes, one for each cabinet or cabinet door. When I selected each text box, I could dictate exactly what height and width I wanted it to be under Drawing Tools, so I just multiplied its actual mm dimensions by 0.005 and inputed that number in the height or width, to keep everything in the same scale.
I ended up trying five different configurations for that back wall, before deciding that I had to try the layout on the floor (i.e. looking directly down from above), because that section on the right (where the cabinetry had to turn the corner) was causing me trouble. So I kept my same basic room and doorway dimensions (since the width would be the same), and adjusted the sizes of my little text boxes so that rather than reflecting each cabinet's height and width, they were now reflecting their width and depth.
And I ended up with this.
I only actually tried one version of the plan from above, since having gone through all of the wall options first, I had a fairly good idea that this particular configuration would work the best. It corresponds with Option 4 for the wall cabinetry along that back wall.
And because they're a little blurry at that size, here we are zoomed in to just the wall space. All of the doors with orange surrounds are ones that didn't come with cabinets, so I'm going to need to figure out cabinetry options for them. The pink area represents the new corner pantry that is going to have to be built to suit the tall doors.
We're not set on this plan for sure until we figure out how we can actually achieve it. A few discussions with cabinetmakers are probably in my near future. But it feels good to have at least got some of the kitchen cabinetry organised, with a tentative plan for the rest!
Plus, I think I've come up with a genius plan for some of the other cabinets that don't fit in this plan - namely the sink base cabinet and the single stand-alone pantry cabinet. Stay tuned!