DIY Explanation

pour améliorer, meaning 'to improve', is a humble record of our renovation, home improvement and landscaping projects, with our travel adventures thrown in.

29 April, 2013

Eyesores be Gone!

In this final push to get this house renovation complete, we're finally knocking off all of those niggling little issues that have been bugging me for way too long, but haven't been important enough to actually bump up to the top of the priority list.

But no longer! Eyesores be gone!

Can you spot the eyesore in this shot?


If you ignore the crazy upside-down lampshade acting as our light over our dining table (don't worry, it's on my hit-list too), there's that still-unfinished bathroom doorway staring you in the face. With the yukky old board covering up the window space above. It's got to go!

So before we play fix-it, let's take a quick little doorway journey down memory lane! This is what that wall used to look like. What doorway?


And then Tom attacked it with the circular saw...


And we installed some door posts on the inside...


And salvaged the old horizontal piece that was originally over the long-gone kitchen doorway. And stuck up that hideous old board so that people could do their business in the bathroom without everyone in the dining room listening in.


And so we were left with this. For a long time. The icky board above the bathroom door is one thing, the slats above the laundry door to the right aren't really my thing either.


But before we could change things above the doorways, we first had to actually finish off the trim around the bathroom doorway itself. We bought a plain trim piece to run up the inside of the doorway to cover over the sides of the VJs and make everything lovely and smooth...


And we finally bit the bullet and bought ourselves a little multifunction tool so that we could cut through the chair rail and skirting board neatly, in preparation for an architrave to go around the door frame.


It's taken us two years of renovating to come to the realisation that owning one of these tools would be really handy for those jobs that require a bit of care and precision.


And then we pulled out the pieces of architrave that we originally pulled off the kitchen doorway, and nailed them in around the bathroom doorway! As you can see, I couldn't wait to attack it with the wood putty before taking a photo.


And then, finally, it was time to give that awful board its marching orders!


We could have simply replaced the board with a better-fitting piece and painted it, but because the bathroom and laundry both have lovely windows that let in quite a bit of good light, we decided that fixed glass panels would still provide a sound barrier, but let the light flow through into the dining room. So, we took the measurements of the window sections above both the bathroom and laundry doors, and then Tom toddled off to a glass shop to get two pieces of clear glass cut to size.


It was looking great as Tom popped the first panel into place.


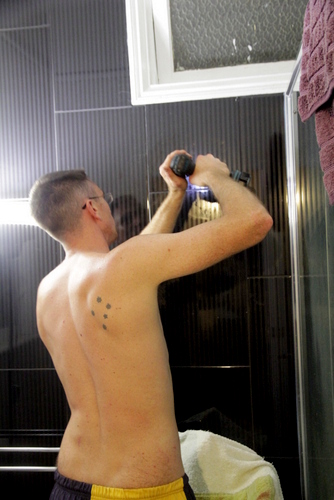
But unfortunately nothing in this house is straight or square, so the panel hit a bit of a bumpy bit in the middle that needed some sanding before it would slot in properly.


So while Tom sanded, I took photos, and Allie played with her favourite toy. Everyone's happy!


This is a pretty typical face while we're working on the house.


And then the glass popped in nicely.


Isn't it pretty? Like a real doorway!


The laundry doorway got the same treatment...


And it was like they'd been like that all along!


What do you think? Does glass above a timber doorway work?

The Claw

Surprisingly enough, I'm not referring to this claw.


Or even these.


No, this is the story of another kind of claw. A much more attractive-looking one, I might add!


Almost immediately after we got out claw-foot bathtub secondhand along with our kitchen cabinets, one of its claws broke off, leaving the poor bath a little unstable. And of course, it was the most conspicuous claw, the one nearest to the bathroom doorway.


Our temporary fix-it solution was to wrap a brick in an old towel and jam it under there to support that corner of the bath. And then we proceeded to shower in the bath for more than two years, living with the fact that when you placed your feet in certain spots, the tub would rock a little bit.


Well enough is enough!

Since there was no repairing the actual plate bit on the bottom of the tub that is supposed to grab onto the top of the claw, we had to come up with another solution.

And that solution is  to add a fifth leg! We found this adjustable rubber support thing at Bunnings, and mucked around a bit with positioning it so that the bath would no longer rock.


And as you can see, we could then just slot the fourth bath claw back into position, and like magic, our bath had four claws again!


You can hardly see our fifth leg in the shadows under the tub, and it's completely obscured from view from the doorway by the claw itself!


I think this is yet another job that deserves a place on the "I can't believe it took me two years to get that done!" list!

26 April, 2013

Suite Dreams

I'm running out of ensuite puns, clearly!

And now that song is in my head.

I just searched the word "ensuite" on this blog to figure out what I last showed you, and shame on me, it was this as the tiling was finished. Back in December last year!


For shame! That was more than four months ago, and throughout most of those months we have been happily using it as a fully functional bathroom! So how about I show you what it looks like, at long last, huh?

The plumber came and fitted everything together... the narrowest pedestal vanity I could find, the shower head and taps...


And of course the toilet. This shot does really well at showing you the total space in this room. It's only about 2 metres wide and 1.5m deep, but we did our best to make the layout as un-cramped as possible (while still getting the shower as big as we could).


Despite those priorities though, there was one thing I wouldn't budge on, and that was that the pedestal vanity HAD to be centred off the doorway to the room. That squeezed the shower a little bit, so it was only about 700mm wide. But with a 1.5m length it's still workable.


And with all of the bits installed, our glass man came and installed a lovely semi-frameless shower screen to contain everything, and we were set!


And you can see that the stained glass window reflected in the glass of the shower door looks pretty good with that strip of black mosaic tile.


So once all the main bits were installed by the professionals, then came time for us amateurs to add all the extra things... things that prevent you from having to keep your toilet paper on the floor and your towels hung over the shower door.

So, we huddled around the vanity.


More specifically, we huddled around the vanity, Tom putting all his weight into drilling through the tile, me using a little squirt bottle to squirt his drill bit so that it stayed effective.


Repeating that process numerous times allowed us to then do this... install the brackets for our various bathroom paraphernalia...


And slowly things started coming together... voila towel rail!


I obviously didn't thing the toilet roll holder was worthy of being photographed, sorry. Next item was a mirror to go above the vanity! Repeat hole-drilling process...


But let me go back in time a little bit and discuss my mirror of choice. As you know, I found this mirror on Ebay for our main bathroom and spray-painted it silver.


Well about a year ago, my mother commented that that main bathroom mirror looked a lot like one that she had been given as a wedding present years ago, that she had never even really brought out of its packaging. Since I would need a mirror for the ensuite, she offered to gift it to us!


As much as it would give us the matching-ness between the bathrooms that we were looking for, I was a bit worried about manhandling (i.e. spray-painting) one of her wedding presents! But she insisted, and I wanted it too much to fight too hard against her, so this mirror began its new life!

I flipped it over and removed the glass from the back...


And puttied any strange holes or imperfections in the main frame.


Then I gave it a quick hand sand and perched it on an old drainage bin for a few spray coats. This was after the undercoat.


And then a couple more chrome spray coats and then a clear gloss coat later, we were left with this!


Which we then hung up on the wall above the vanity, giving us a little bathroom that was begging for some "mirror, mirror on the wall, who's the fairest...." action.


But we weren't quite finished yet. The one thing we were missing in this little room was storage. Any storage. So, at my last visit to IKEA, I invested in some black $9.99 EKBY VIKTOR shelves and $5 EKBY VALTER brackets so that we could put up some shelves above the towel rail on the black pinstripe tile wall.

And then there was more drilling.


We decided to cut the back off the shelves to make them shallower, since the last thing we want is to make this small room feel smaller by adding too many things at eye level.

And unfortunately my picture-taking commitment appears to have disappeared around about now, because this is the only shot I took of one of the shelf brackets installed in place. At least it demonstrates that their black-ness camouflages them against the wall!


Proper finished shots of the ensuite should come soon, but for the moment, let's enjoy the comparison with what it used to look like, shall we?


23 April, 2013

Metal Trumps Timber

We've been wondering for a while what to do with the original boring and seen-better-days front door to our house.


It doesn't really make a lot of sense to have a full-sized flat door to an open verandah, does it?


Plus, we get beautiful breezes coming down the hill and sweeping through the verandah now, and that hard door stops them all in their tracks, so we have to chock it open, which as you can see from the above shot, messes with the beautiful symmetry of that little front balcony area and offers no security whatsoever!

So, something has to be done. I've been thinking for a long time about what options we might have for making a timber gate and a smaller security panel to go above the railing to the side. Since, let's be honest, making it super easy for burglars and the like to just leap right over and into the house is not really my idea of a good time.


And even after taking a couple of little scenic drives through suburbs like Chelmer and Graceville staring at all of the timber verandahs and checking out their gates, I couldn't come up with anything I liked the look of enough.

Add to that the fact that getting a timber gate and security panel custom-made would cost us an arm and a leg, and I was beginning to despair.

And then I thought of this gate that we had made for our last house.


We had asked a local steel fabricator to make it up for us, and rather than hand-drawing a fancy one-of-a-kind design and then hand-making everything, he bought pre-made decorative panels and then welded them all together for us. Much cheaper!

At first I immediately dismissed the idea of putting a steel gate on a timber house, but the more I thought about it it made sense! It would let air flow through beautifully, and the black colour would play off all of the other black trim on the house and even the little stained glass window. And, of course, it would look amazing!

Tom loved the idea, so I decided to borrow the steel guy's big brochure of pre-fabricated panels and muck around with possible designs.

In fact, I photocopied all of the relevant pages and then cut out the bits to play with them. Yes, I'm insane. Get over it.


It didn't take me too long to figure out that this had to be one of the most inefficient ways of designing something EVER. Particularly since the little pictures of each panel in the book weren't necessarily each in the same scale, so some panels that were smaller than others were actually pictured larger. Nightmare.

So I turned to my computer, and resized everything appropriately to muck around with it. Can't believe I didn't just do that first.

Anyway, this is the first option I came up with. And I loved it. But I had to take a step back. Given that in the beginning I didn't even plan on going for a wrought iron look, this design was upping the ante quite a lot. It would take eight of that main swirly panel plus others (translate that as $$$$), and in my opinion it was just a bit full-on. Too tizzy for this house.


So back to my virtual drawing board!

This was attempt number two. And as a more roomy (and therefore less tizzy) option certainly had the makings of a winner, but it wasn't quite wide enough to fill the full door space, and I couldn't figure out how to make up for that without adding weird squishy bits in the centre.


So we called the guy over for a proper meeting (and a measure-up of the space). He and I mucked around with various options, including putting an extra border around the edges, which I didn't much like. The option we eventually settled on was to add little straight pieces on the tops, bottoms and sides of each fancy panel, to widen the whole thing so that it would fill the frame size without having much visual impact. The same for the smaller security panel.


So with that plan in mind, I waited impatiently for him to order in the panels, weld it all together and then get it painted.

And a few weeks later... it has arrived!!!


This is my favourite kind of house job. Minimal physical exertion on my part but heaps of creative input, and then it's like you snap your fingers and the work is done! Oh, but then you get the invoice. Perhaps not my favourite.

But since you don't have to pay the invoice, you just get to enjoy this "voila, like magic!!" moment...


What do you think? Don't they look amazing?


I prefer this view.


And as you can see, they play beautifully with the stained glass window and its little black window-sill.


From the street they're not super-obvious, which isn't a bad thing in my opinon, since it's not immediately obvious that we've added tizzy metal bits to our all-timber house.


But then again, they look amazing, so who cares that we've added metal bits, right?


Someone else is particularly enjoying the ability to personally greet each visitor to the door. She's such a lady. As you can see, I've attempted to preserve her doggy dignity.


 My three favourite things in the world!!!! Doggy, fancy new gate, oh and husband.


What do you think of my new gate? Is it sacrilege to put a metal contraption on the front of an all-timber house? Or have we got away with it?
Related Posts Plugin for WordPress, Blogger...