DIY Explanation

pour améliorer, meaning 'to improve', is a humble record of our renovation, home improvement and landscaping projects, with our travel adventures thrown in.
Showing posts with label House Raising. Show all posts

11 January, 2013

Frilly Bits

I last left you with this shot of our poor little ugly duckling house still looking as ugly as ever.


Well I've been getting very sick of walking up those front steps and shaking my head at the ugliness of it all, so stay tuned for some serious changes around here!

First up? What I'm calling 'the frilly bits'. The little decorative bits and pieces that transform the front of house from boring and plain to attractive.

When we first bought this house, it had these lattice-ey frilly bits underneath its front section. Not exactly amazing, but better than nothing.

And in my imaginings about what this house would eventually look like, I've always thought we would do something like this.

Source
And in case that isn't very clear, I mean these vertical battens cut into a curvy shape under the verandah, to add a bit of character.

Source
So that was the plan. But then it came time for me to figure out how to accurately describe to my carpenter what I wanted, so I pulled up this old picture I took of the house while the roof scaffolding up, and I pulled out my virtual paintbrush and started drawing all over it. I was certain that I wanted to extend the two narrow vertical sections of weatherboards to the left of the staircase all the way down to the ground. But then it came time to draw on the curvy batten skirt between them, and something happened. Either I wasn't confident about my ability to freehand a curve using a computer mouse, or it just didn't feel right to put a curve in there when all of the rest of the lines are so straight.


Whichever it was, those straight lined bits beneath the upper story were what I ended up requesting, and I felt good about it!

I felt even better when the carpenters actually started building it. The weatherboard sections got framed up and installed...


And we decided to basically replicate the stair railings, with the same size of batten and spacing and top and bottom rails, a little separated from the bottom of the verandah so there's a gap. Again, just like the stair railing only squished!


I could hardly contain my excitement to see those little details finally taking shape! I've wanted to do this for so long!!


So back to the other side! Here's my shoddy little paint drawing again. As you can see, the area to the right of the stairs also got similar treatment, although I decided not to continue any weatherboards down to the ground on that side. I just couldn't make it seem like it would work well.


In reality, this is what that area looked like. The little spindly naked steel pole in the corner certainly wasn't particularly attractive, so the builder came up with an idea to simply box it out with some decking boards so it would actually look like a nice chunky timber post.


And so, in hardly any time at all, that area transformed into this!


A thousand times better, don't you think? Even if the colours are still a mismatched hodge podge of ugliness, at least now all the various timber things look like they're supposed to be there.


So then the house looked like this! Major improvement, right?


But we weren't quite done. The same council issues that made us raise the floor in all the living areas downstairs also dictated that we not close in the garages with weatherboards either, as we had originally planned.

Instead, we had to let air flow through. So, the carpenters ripped out all of the timber framing between the garages, replaced it with steel crossbars for bracing...


And started installing battens.


These kinds of tasks make me so happy, because they feel almost instantaneous. One minute there's nothing, the next minute there's something that looks like a wall!


So this became the front wall of our garage...


Which looked like this from the front. So finished-looking all of a sudden!


And it was a pretty dramatic improvement inside as well.


So there you have it! In what has to rank as one of the most drastic changes we've experienced so far, the house turned into this! If you ignore the junk in the front yard, not half bad, right?


Is anyone else DYING to see some new paint on the front there like me?

29 October, 2012

Torture by Weatherboard

The obvious next step for our all-wrapped-up-in-blue-foil house was for the external cladding to go on. Namely, weatherboards!

The builder and I decided to get proper hardwood weatherboards instead of cheating and going for a modern fabricated board that simulates weatherboards, because the clean straight lines of the newer man-made version would probably look too perfect directly beneath all of the existing not-perfect timber boards on the house.

So we ordered 900 linear metres of them, and I got very excited when the crane truck arrived to deposit them in the backyard. Thus the Instagram shot...

But my excitement was a little shortlived. It didn't take long to discover three things:

1) That 900 linear metres of weatherboards means LOTS of weatherboards.


2) That all of the boards were covered in wet, gunky sawdust. So because two boards were always sandwiched together in the pile (wet, sawdusty side inwards), they hadn't had a chance to dry out.


3) That all of the boards should ideally be primed, both sides, before fixing them to the house, so that they would be nice and sealed and there would be no chance of seepage of anything.


And so began my extreeeemely slow torture by weatherboard. Because, having just paid my builder's first invoice, I was in no mood to pay anyone to stand there for hours on end scraping sawdust and painting the things when I could do it, so do it I did.

I eventually developed a system where I would lay out a batch of to-be-painted boards sawdust side upwards in the yard to dry out.
 

Meanwhile, I would use a flat shovel to scrape off all of the sawdust, then brushed off the excess sawdust with a little brush.


And then I used a mini roller to roll on that primer. Board after board after board.


A batch of about 8-10 boards would take me about 1.5 hours. So by spending every morning before work and with a concerted effort by Daniel and I over the course of a full weekend, we managed to get the bulk of the boards painted.

I don't think I'd be upset if I never saw another weatherboard.

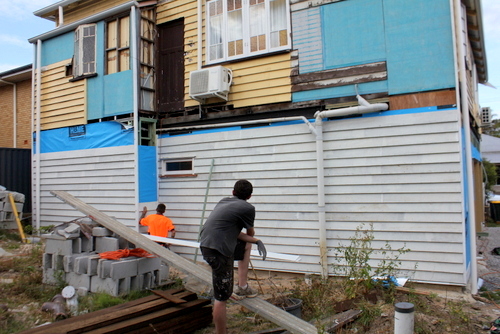
But at least then we finally got to start seeing the fruit of our labours as the carpenters started attaching them to the house! The back...


The side...


Around the garage door openings...


The other side...


That same other side a bit later... Daniel chipped in to help them for a couple of days when he wasn't working, as it sped up the process considerably having a third pair of hands.


When we reached this point it had to be one of the most exciting moments to date for me. It looks like a real house!


I also celebrated the moment with an Instagram shot from the stairs.


So that got the lower layer of weatherboards on the bulk of the house. Next it was time to move up to the second storey, which was looking like a crazy patchwork still, with the pieces of blue board up there that Tom's brother and I had installed for a bit of weather protection.

The blue board got replaced by more foil wrap.. equally unattractive.


But not before the blue board came down and I got to enjoy my extremely open air laundry from inside once again!


 And then the weatherboarding continued.


How's this for a before and after of the back of the kitchen?


Even with just the kitchen section fully weatherboarded we were seeing a major improvement!


But lets take a little walk down memory lane, shall we? First is a shot of the house very shortly after we first bought it, with the old bathroom still hanging on the back for dear life (see here for details of the day it died). Next is a shot of the back of the house at what I'm calling the height of its ugliness...


And now, a streamlined, weatherboarded picture of perfection! Well nearly. There's a bit more work to do to tidy up the plumbing and that ugly black steel beam running along the back wall that's sticking out from the line of the weatherboards.


But we now have a proper timber two-storey house! Hooray! It's amazing how much you can achieve when you pay people to do the hard yakka, huh?

15 October, 2012

We Hit the Roof!

Ever since we bought this house, the roof has been terrible. Unfortunately, because the house is so tall (no surprises there since we raised it... twice!) I don't seem to have managed to capture the extent of the rusty horribleness that is the roof very well. You can just get a glimpse of it in this old (and dim) shot in the section of roof that's visible above the front door. Those little tiny darker patches that you can see are rust. And the entire roof looks like that.


Well... used to!

But let's not get ahead of ourselves.

The problem wasn't just that the roof didn't look very nice. There was also this.


That picture was taken during a patch of heavy rain when the ceiling above our bedroom doorway was dripping. Never a good thing.

 So, it's been inevitable for some time that we would replace the roof. And we've finally done it!

I got much too excited when the scaffolding truck arrived.


And Allie very quickly learned to share her front steps with the support poles.


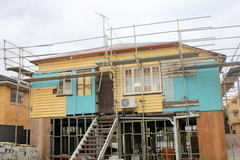
And soon... the house looked like this!


But, as always, things weren't as simple as hiring someone to put on a new roof and leaving it at that. Of course not! That would be ridiculously easy!

My main problem was this. This is the outside result of our attempt to create symmetrical kitchen windows on either side of our oven. Not particularly attractive. But that in itself wasn't the problem (at least not immediately). The problem was that because replacing the roof also involved replacing the little roofs on the awnings above our windows, we had to deal with the awning situation here first. The old awning above the left window needed to be shortened, and the new little window on the right needed its own little awning.


We briefly considered just extending the length of the existing awning so it runs across both windows, but since I figured that would look pretty strange, we decided to bite the bullet and bring in a carpenter to solve the problem for us (since our local timber supply place didn't sell pre-made awnings with the right bracket style to match ours). So while the gutters were installed, the carpenter worked.


And soon we had this! Hooray! Looks like a real house again!


But that was just the beginning. Then the real fun started, because the roofers arrived and started ripping off the old roof sheets with great gusto. As my front yard can testify.


And I got to enjoy the sun peeking through the giant crack in my dining room ceiling for a while.


I even managed to convince the roofers to help me run an electrical wire (which wasn't connected to anything else, so perfectly safe) into the ceiling above my kitchen sink while the roof sheets were off, so that I can have a light there in the future. How clever am I?


And within a day, they had the new roof on!
 

Because the 'edge protection' roof scaffolding had to be removed before they could replace the roof sheets on the awnings it took a bit longer to get them done, but aren't they pretty now they are done?!


I particularly enjoy looking at the spot where all the new gutters meet just near the front door. Although I can't say I'm much of a fan of the little right angle turn that the new downpipe now does under the window sill there, since I have grand plans to one day have a window box in that spot with flowers in it. Hmm. Must get that changed.


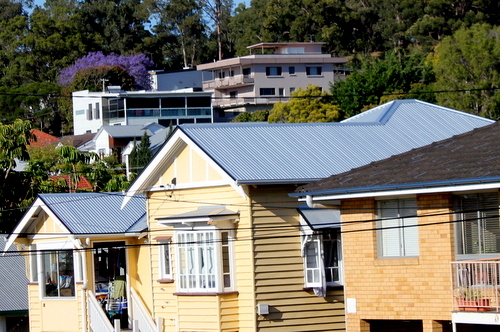
But in the meantime, we have a brand new, clean and neat and tidy and non-leaking roof! Oh the luxury! Here it is from up the street a bit.


And here it is if I climb a bit higher up the street, which is essentially the only way we can actually get a look at the new roof. I realise that the grey/black/yellow colour combination that the house is now sporting is a little bit strange. But believe me, I'll be getting rid of that yellow once and for all at my first opportunity! Not that there is anything wrong with yellow of course! We've just had enough!


And just now, in a moment of genius, I realised that I can look up our house on Nearmap.com, which shows what the house looked like from satellite photos at various intervals over the last couple of years.

Here it is about a year ago, in all its rusty glory (although believe me, this photo doesn't even come close to showing the sorry state it was in).


And here it is just last month! Brand spanking new! Love it.


It never ceases to amaze me just how fast things happen when you pay people to do the work! What do you think of my new roof?
Related Posts Plugin for WordPress, Blogger...