This was a real doozy. It all started with the fact that I knew a tiler from a networking group. I wanted this tiler to do all of the tiling in our new house, instead of the random tiler that the builder would organise. So, we deliberately took the cost of the tiles and tiling out of our construction contract (which only saved us like $4,000 on the builder's price, which was ridiculous), so that we could give the job to our tiler.
We kept the tiler informed about the progress of the house, so he'd have enough notice to schedule us in at the right time. It all sounds fine, right?
Wrong. Then it came time in the builder's schedule for the tiling to occur, and our tiler wasn't ready. So the builder switched the painting and the tiling (ordinarily the painters would paint after the tilers do their bit), so that our tiler could have another week's grace.
They still weren't ready. By now we're only about a month out from Christmas in 2008, and we were desperately hoping to be in our house by Christmas.
So. Fed up with our tiler-who-promised-the-world-but-delivered-nothing, we searched for other tilers that might be able to do the job urgently. We found one, and set him to work.
Here's the entryway to the house, with tiles and blocks of wood laid out to demonstrate the pattern we wanted in that area.
While our tiler was at work, Tom popped in one afternoon to check on things, and take a few photos. This is what we saw.
The bedding in a ramp from the tolet up to the rest of the bathroom
The main bathroom shower - bedding down.
The beginnings of the floor tiles being laid in the ensuite and toilet.
The floor of the ensuite shower tiled, and most of the wall tiles up.
The ensuite shower again.
The beginnings of the feature in the ensuite shower.
The toilet.
And that's where it went very bad. The builder's site supervisor visited the house the next day, while our tiler was at work, and practically exploded with rage. Remember this photo of the bedding ramping up from the toilet to the bathroom itself?
Well apparently that is NOT the way Australian tilers do under-tile bedding. They usually put a 2-inch thick layer of the rubbery concrete bedding down across the entire floor, and that gives them the necessary height to have a gradual fall in the floor towards drains. They do NOT lay tiles straight on the floor, as our tiler had done.
It then came out that the tiler didn't even have an Australian licence. We had asked him before he started work if he was licenced, and he said yes, but he couldn't produce it when asked by the site supervisor. So, he was kicked off the premises, and we were left with the very sad task of ripping up all of the tiles that he had laid.
The builder then had to get the waterproofer back again to re-do the waterproofing that had been damaged when we ripped up the tiles, and the plasterer to do the same with the damaged walls. Which of course, cost us extra!
The search for another tiler then began again, with us now pretty resigned that we weren't going to be in our house by Christmas. We found one (thank goodness), who could produce a licence, and the process started again. Here are the progress pics:
 |
| Shower in the main bathroom |
 |
| Bath and vanity in the main bathroom |
 |
| Floor of the main bathroom |
 |
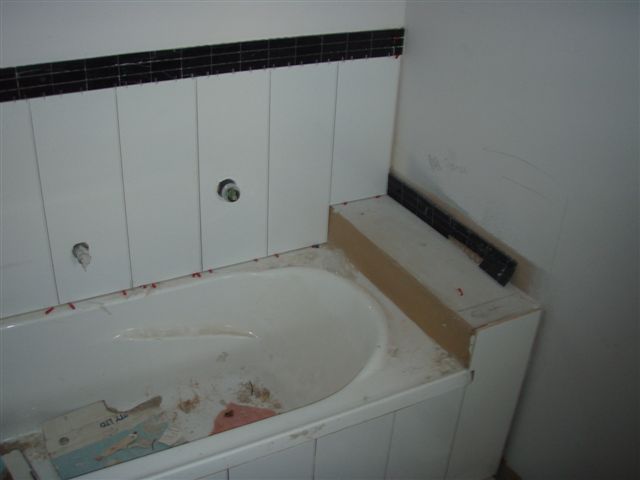
| The end of the bath under the vanity in the main bathroom |
 |
| The shower in the ensuite |
 |
| The bath in the ensuite |
 |
| Another view of the shower in the ensuite |
 |
| Shower floor in the ensuite |
 |
| Main floor of the ensuite |
 |
| Main bathroom with feature tile up |
 |
| The correct bedding in the toilet |
 |
| The ensuite shower with feature tile installed |
 |
| The ensuite feature tile |
 |
| The washing machine cavity in the laundry |
 |
| The powder room floor |
 |
| The Entry |
 |
| The laundry floor |
 |
| The powder room floor, complete |
 |
| The powder room vanity and tiles around the mirror |
 |
| The kitchen splashback |
 |
| Kitchen splashback again |
 |
| The kitchen. |
We actually ended up asking the tiler to redo the splashback along the wall behind the stove, because the vertical grout lines were just off-centre, which made it look very strange where the stove sat under the rangehood. That caused a bit more plasterboard destruction, but it was worth it.
 |
| The toilet |
 |
| The shower in the main bathroom, with floor completed |
 |
| The floor in the main bathroom |
 |
| The other side of the main bathroom |
 |
| From the doorway to the main bathroom |
 |
| From the doorway to the ensuite |
 |
| The bath in the ensuite |
 |
| The shower in the ensuite |
 |
| The vanity in the ensuite |
 |
| The bath from another angle in the ensuite |
 |
| The washing machine cavity |
 |
| The laundry bench with completed splashback |
 |
| The step-up to the ensuite |
 |
| The finished ledge on the end of the bath in the main bathroom |
 |
| The main floor in progress |
 |
| The dining room in progress |
 |
| The living room in progress |
 |
| From the living room across to the dining room |
 |
| Allie checking it's up to scratch |
 |
| The dining room into the kitchen, in progress |
It was a long, hard, expensive slog, but we got there in the end, with a quality tiling job.
Lesson learned? Use the builder's tiler unless it's:
a) Going to actually save you money to use your own tiler (it definitely didn't for us); and
b) Going to absolutely guarantee you a better result than the builder's tiler doing it - i.e. you have a contract signed in blood with the tiler that he'll do it when he says he will, and really well
AND.... always always always always insist on seeing tradespeople's licences before they do any work!
In the end, no harm done. We didn't make it into the house by Christmas, but in hindsight those kinds of frustrations don't really mean much.
For our other major mistake,
see here.
To go back to the menu for our Next House Construction,
click here.


No comments:
Post a Comment