

Remember those floorboards we removed from the bathroom a while ago?
We've now finally got to the stage with our kitchen extension where we can rip up the crummy floorboards and replace them with the boards from the bathroom.
Unfortunately a few of the tongues on the boards are a little worse for wear after being pulled apart from each other, but we'll hardly notice when they're nailed in place and then sanded and re-stained.


So, Tom got cracking with the drop-saw and circular saw, and made relatively quick work (although not quick enough for our noise-hating neighbours) of cutting the floorboards down to the sizes I stipulated in my plan:


Allie taking an interest this time and inspecting whether Tom's lined it up right.

Gotta luv the good ol' School house shirt!

Putting a cut board into place.

Tom's favourite saying is "measure twice, cut once". And so we did.

Tom, Daniel and Allie conferring about the state of the floorboards.

Tom and I triple-checking the measurement for the next floorboard. Allie still taking a keen interest.
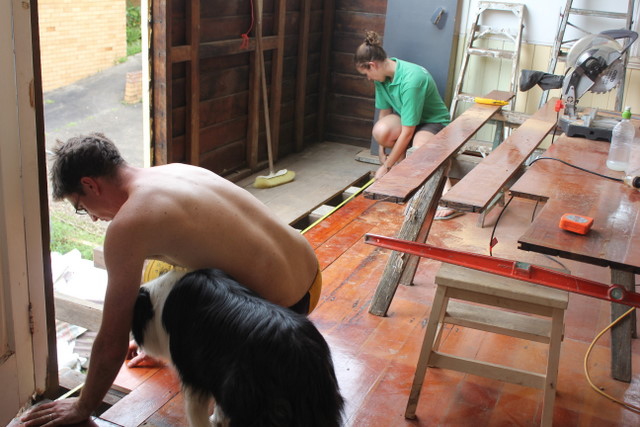
Tom and Allie scrutinising the measurement closely. Allie likes it to the nearest millimetre.

Some of the boards in place.

Tom's interesting choice of sawing position.

The next board needed to fit around our recently positioned vertical post.

So we cut out yet another notch.

And it fits!

We managed to preserve four of the bathroom floorboards in their still-stuck-together condition, so it made cutting them down to size and positioning them a much quicker process.

Tom giving the new floor a good hit with a hammer.

Hammering in little nails to hold the new floorboards in place. We still have a final one to cut to size and slot in on the very edge there, but decided to give the sawing a rest for the neighbours' sake.

Because that western wall faces west (duh!), the minute it gets past midday the kitchen (now being almost completely open on that side) gets full sun, and become extremely hot. We therefore decided it was a wise move to hang the tarpaulin back up. Notice Tom using our lovely new floor to stand on while attaching it?

Just on a side note, I've been wondering if we should consider putting little windows in the wall above the western horizontal beam, to give us a bit more light in the kitchen. Then again, adding windows on a western wall is not particularly ideal given the fact that that will also introduce more western heat to the room. Perhaps we should go with a skylight instead. Anyone got any thoughts on that? Here's that wall.
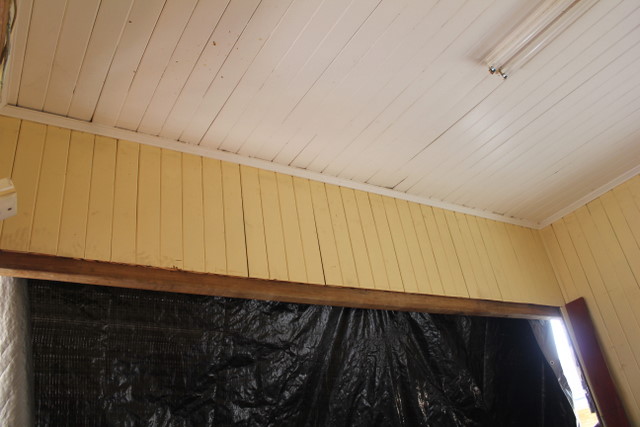
And here is the view from underneath that wall (standing in the add-on), where you can see the vertical posts running up above the horizontal beam. We'd have to position any little windows between those verticals.

Tom and I decided we'd use the kitchen to dine in style.

Next step (finally!!!), we can start on the framing for that extension, and we may soon have a fully enclosed kitchen again!
Love,
Bec
No comments:
Post a Comment