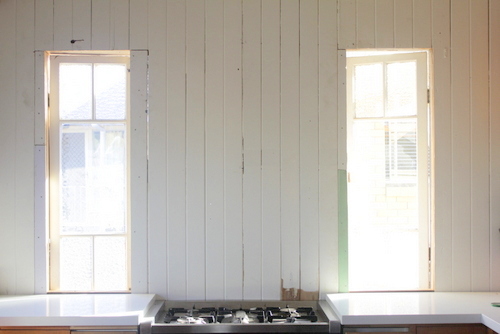
It wasn't finished though, so I spent the next week gazing at the unfinished bits and chomping at the bit to sort them out. So the next weekend, when I found myself alone yet again (what's with the boys in my household conveniently having to work on the weekend lately?), I didn't waste any time. All of my previous trim effort had completely neglected these guys - our little symmetrical windows.
So obviously I had to correct that. But in order to do that, I had to get on speaking terms with this guy, the circular saw. Tom's good friends with him, but to date I hadn't been brave enough to introduce myself.
But there was no avoiding it any longer. Because of this. I needed to attach some plain trim to the insides of each window frame, to cover over the ugly exposed edges that were still visible. But we couldn't get pieces of timber that were quite the right width, so I was going to have to cut about 8mm off the entire length of each board.
Thankfully I had watched Tom working with this guy enough to have a few tricks up my sleeve. Well, the concept of the tricks. Whether I could actually physically pull them off was another question.
As you saw above, I marked where I needed my cut line to be on the board. Then, I measured the distance between the blade on the circular saw and the outside edge of the plate that sits around the blade.
And then I measured and marked that same distance from the cut line that I had drawn...
Then carefully positioned a long level in line with the extra marks that I had made.
And clamped it in place so it wouldn't budge.
And then... the part where all of that manouevreing finally makes sense... I pulled out the circular saw (took about 5 minutes to figure out how to actually turn the thing on), and then I could just rest the edge of the plate along the level, so that the blade cut a beautiful straight line exactly where it was supposed to.
And... I just can't describe how proud I was when it fitted perfectly exactly where it was supposed to (it's the vertical one on the left there).
I repeated that process for the other side of that window (and the second window), along with the tops of each.
And then I moved on to the window on the other wall (the one we had to relocate - boo). In the first round of trim-ing, I put up this cornice that extended the full length of that wall (including above the window).
As you can see in this older shot of the window though, that cornice had nothing but air behind it over the window.
So I had to address that problem. I found an almost-the-right-dimensions timber post outside, and used my circular saw trick again to cut it down to the perfect size.
And bolted it in. It sounds easy, and it's always looked kind of easy when Tom has done this kind of thing. But let me tell you, it was HARD! Bolting timber upwards (i.e. when gravity is completely against you) into a hardwood frame while perched precariously on a window sill with a sink on one side and a 5-metre drop on the other side is not easy. But I survived. Just. I shudder to think what might have happened to me if I'd actually fallen, since I was home by myself. Don't follow my example, kids.
And then I moved on to the bottom of that same window. We'd saved a bit of internal window sill trim from the original kitchen window (just as well, it's probably virtually impossible to get this stuff now without having it custom made), and thankfully it was the perfect height to sit straight on top of the benchtop.
I then repeated my board-cutting process to trim out the two vertical edges of that window frame, and then I could finally move on to the really pretty stuff - the trim. And in virtually no time (well, quite a lot of time actually, if you count the fact that I spent the next day wearing the skin of my index fingers puttying all of the screw holes and joins, so these photos were taken after that), the twin windows looked like this...
The west window looked like this...
And all the other bits looked like this.
And this. As you can see, I'm still not entirely finished, since that corner above the trim still needs an inconspicuous piece to cover over that gap.
And I ran out of putty before I could finish off the join between the trim and the cornice on this window.
Am I totally a pro, or what?!


No comments:
Post a Comment