
We decided to convert the original small third bedroom in the house into a bathroom (see here for the early stages of that plan), covered the timber walls in fibro, painted the ceiling, and got a tiler in for a quality (and speedy) finish. We actually ordered all of our tiles well before we even moved into the house, and the boys had a lot of fun moving the many heavy packs of tiles around the house as we redid the floors in other rooms, before we got the new bathroom underway.

So shall we start with a couple of 'before' shots?
This is the disgusting bathroom that came with the house, which threatened to actually fall off the house when we raised it. It was dirty, it was dingy, and it was dangerous!

This is the little third bedroom that we designated as our new bathroom. Since it's within the original roofline of the house, there are no risks of it falling off the house! This view is from its original doorway, although we later closed that up and moved the doorway onto the right wall, which adjoins the dining room. This shot was taken after we had cut out some of the floorboards in order to use them in our little kitchen extension, and replaced them with some plain board. Since this floor would be tiled once it became a bathroom, we figured it could afford to do without the floorboards.

This room became something of a 'Room of Requirement', serving as my hardware sorting room at one point..

And later as a storage room when we sanded, stained and polished the floors in the rest of the house. You can even see the packs of tiles lining the floor.

Our bathroom plan (and entire colour scheme) started with this gorgeous old cast iron claw-foot bathtub (from the same house where we got our second-hand kitchen cabinets), for the grand old price of $350. Considering that newer less sturdy ones retail for well over $1,000, we were pretty thrilled with that deal.

We spray painted the original brass feet chrome - a shame to cover up the old brass, but our bathroom plan demanded chrome, so chrome they had to be.

When we popped the bath near our newly purchased white toilet we realised that the inside of the bath had discoloured over its life, and was a long way from the white of our toilet. It did not look good, and threatened to ruin the fresh look of the entire room. So we took the bath to a car spray-painter who re-coated the inside in a nice fresh white for us for $600. Good as new! Just as a side note, we carried that bath in and out of the house about four times in the end, and it is insanely heavy! Getting it up our tied-on back stairs was certainly a hair-raising exercise!
All worth it in the end, though!

Here is the view into the bathroom from the new doorway.

We managed to also salvage the old telephone tap fitting from the house we got the bath from, which potentially saved us another $1,000, since they're incredibly expensive to buy new. The two damask shower curtains I got from Freedom for about $17 each.

You'll note that in the above picture there is also a clear shower
curtain in the centre between the two damask curtains, covering the bath tap. This is because it didn't occur to us
that having a U-shaped curtain rail leaves an open end. Well actually we're not quite that thick, but we didn't expect that when you shower, water bounces off your body, and that wall with
the tap on it gets absolutely drenched, resulting in a big puddle on the
floor! So we strung up a clear curtain between the two curtain rod sections so it would sit just under the shower head, to prevent unnecessary flooding.
I bought the little curtain rings for just under $20 for two 12-packs from Spotlight.

Speaking of the shower head, the one that came with the bath wasn't in the greatest shape, so we decided to replace it (at least temporarily) with the cheapest option we could find at Bunnings. It's doing the job very well for now, although we'll probably look at upgrading it when we find the perfect option - or repair the old one.

But enough about the shower! Let's keep moving around the room! We installed a cheap Venetian blind on the window for a bit of much-needed shower privacy, and pulled out this little extendable magnifying mirror from Ikea that we actually bought years ago when we were fitting out the ensuite in our last house. The mirror sadly never actually made its way out of the packaging, but it's perfect here by the window for shaving-while-showering for the boys, and a bit of make-up-by-natural-light-from-the-window for me.

Further to the left along the next wall sits this Black Beauty, our repurposed buffet, now a glossy black vanity cabinet.

Oh, and which I also happened to paint the inside of Barbie pink.

And adorned with plastic silver and glass candlesticks and little jars of cotton buds.

If you ignore our slightly thready towels (new linen isn't in the budget yet), it's all come together beautifully. Please also ignore the random reflection of a clothes hanger in the mirror.

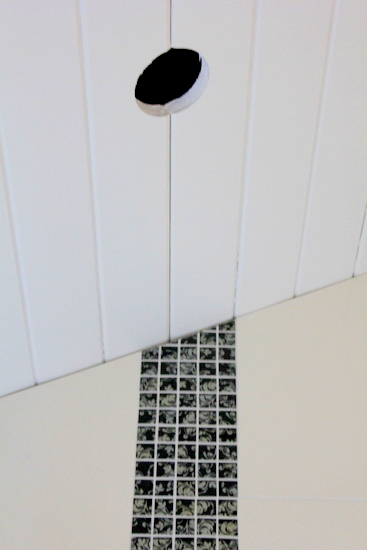
We've even added a towel rail on the back of the door to give Daniel his own towel spot. You will note that we are still yet to fill in the window space above the door, which is a definite must, since it's not ideal to be able to hear each other using the bathroom.

And now we move to the final corner, the little corner behind the door which houses the toilet.

We've only just installed that little vanity cabinet above the toilet for a bit of extra storage. It's a cabinet that had seen better days that I found on Gumtree for $20. A few fresh coats of gloss white paint and it's perfect. Well, nearly perfect. I need to clean up a few paint smudges on the mirror which you fortunately can't see in this photo.

I agonised a little bit over positioning a mirror right there, where people of the male persuasion will get to stare at themselves in the mirror while they... go about their business. But Tom assures me that as long as it's not angled downwards (which would be pretty darn weird if you ask me!), it's no problem. I'm still considering painting over the mirror with chalkboard paint so I can write little messages on it like "Wash your hands". Or is that even weirder?
While we're on the subject of weirdness, is it strange that I really love this particular view in the bathroom? Glossy chrome, damask black and silver mosaic tile, and plush, white... toilet paper. Hmm. Lovely.

It's not entirely finished. There are a few extra bits and pieces I want to add, like another little cabinet above the towel rails (to the left of the vanity cabinet) for more storage, and some artwork in little black frames, along these lines (sourced here)...


But it's a giant improvement on this...


Turned out great..love the tub! Love it all!
ReplyDeleteI am so in awe of this bathroom transformation. You have done such an awesome job! Thank you for sharing it at the Meet Me Monday Linky party! Love, Me www.youaretalkingtoomuch.com
ReplyDeleteI'm impressed!
ReplyDeleteSharon
This turned out SO beautifully! I love your re-purposed buffet and old claw-foot tub.
ReplyDeleteWhat a SPECTACULAR bathroom!!!
ReplyDeleteCan you let us know where you sourced the damask mosaic tile?
ReplyDeleteHi Anonymous, I sourced it from National Tiles, in Australia. Gorgeous, isn't it?
Delete