

We are making slow but definite progress on the construction of our front staircase. You would think it would happen in the blink of an eye given that our two sections of gorgeous staircase are in fact already constructed, but we're taking it carefully so that we don't make any major mistakes, since this is the first time we've attempted something like this.
First there was The Hole Shebang, including the very careful positioning of these steel brackets in concrete to support the stairs.

Then there was The Chop - to cut the stairs to exactly the right size to fit.

And now there's The Landing.

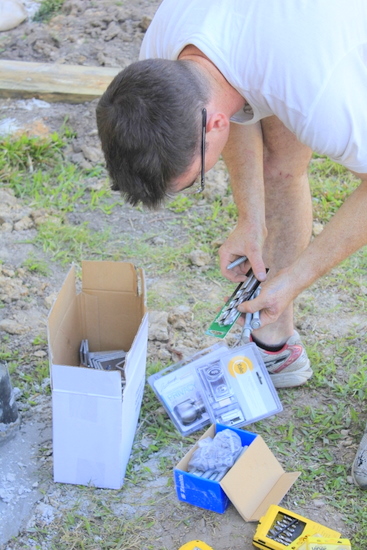
We did our research and decided to spend a small fortune to purchase these beautiful hunks of wood. At $100 a pop they're certainly not cheap, but they're strong and straight, and they'll be worth it. They're called 'dressed, laminated Merbau' posts, which I'm told means that they're made of lots of little compressed pieces of timber mushed together (that's a technical term, "mushed") to make an incredibly strong timber. The 'dressed' part refers to the fact that all of the edges are rounded rather than being sharp and pointy right-angle corners.

But the expenses didn't end there. We then had to spend about $100 on enough nuts and bolts to then attach them (although that did include extra bolts for the future attachment of the stairs as well).
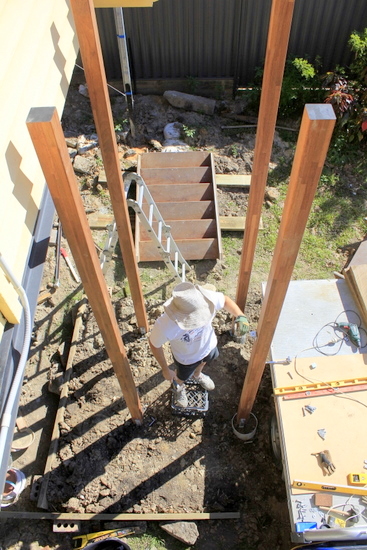
Those posts are 3.6 metres long, which sounds like a ridiculously long length until you see one standing up against our house. Yeah, our house is pretty tall these days on its flamingo legs!

Getting them positioned nicely in place was the easiest part.


And then we bolted them all in properly.

Here's the all-important leveling stage (since we'd paid so much to get posts that level, we couldnt let them down by not putting them in straight)...

And then work started on building the landing - the little area in the centre of all those posts, where the stairs would turn after leading from the front gate to head towards the front door.
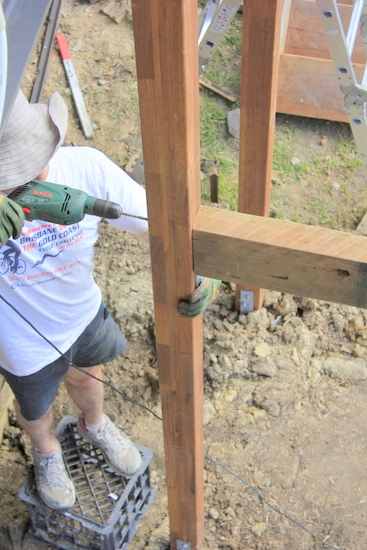
Here's Tom displaying his massive manpower - hand-sawing an extra-thick 3-metre hardwood sleeper.

Actually I have to burst that bubble. Don't try that at home. That timber is extremely heavy and tough. Not hand-sawable without some serious effort. Tom actually used the circular saw to cut mostly through it, and just used the hand saw to finish it off.
The purpose of cutting up that hardwood was to run it between the posts to support the future landing. Here's Tom putting in some metal brackets for some added support from below for the hardwood pieces.

And then screwing in the first of the pieces of hardwood...
Voila! They're all up, and it's time to start putting in the pieces of decking we bought from Bunnings. They cost us about $37, from memory.

It's still a very long drop looking from the house to the landing! You can see the yellow strap Tom tied to keep the two front posts level and in line with each other.

You can see Allie keeping a close eye on proceedings from behind her little fence.

And here's a wider in-progress shot, with the tray of Tom's ute acting as work table.

We're pretty proud of it!
But it wasn't much use to us sitting up there in the air, so then came the next stage of the process. Attaching the little set of stairs! I wish I had more in-progress shots of this, but those things are shockingly heavy, so it was all hands on deck.

Before we began lifting heavy things, we installed some more brackets. We discussed the choice to use brackets in great depth, since they're obviously not the most attractive thing in the world. A clever timber-worker would of course notch out sections in the poles and slot the stairs carefully into them. The joins would then be invisible, and it would all lock together beautifully.
One problem...
We are not experienced wood-workers. We're way out of our depth already, so we decided to save ourselves the torture of attempting to extend our skills even further (and possibly ruin one of our very precious pieces of timber), and went for the easy option - brackets.

Then Tom braced all of the posts together (and to the steel poles of the house) so that they wouldn't get pushed away from the house by the weight of the stairs.

We grabbed a couple of the leftover timber sleepers from our fence project and laid them from the doorway onto the landing, as a bit of a safety net. We didn't want our precious stairs falling to the ground!

And then...voila! Magic! The little set of stairs were in!

No, it was definitely not as simple as that. We decided to carry the little set of stairs up the back stairs (yes, the ones that are tied on to the house), through the house, and then we manouevred them carefully on their side through the doorway, slid them downward along the sleepers, lowering them to horizontal again as we went. Once we got them locked in to the posts of the landing, the boys held them up (which sounds easy, but did I mentioned that these stairs are ridiculously heavy?), so I could frantically remove the sleepers.

They slid down onto the brackets we'd installed earlier on the landing posts, and it was perfect. We had somehow managed to get the measurements right! Thank goodness! We're proud as punch!

It was then a relatively simple task to bolt the stairs in at the bottom and the top, so they're secured to both the landing and the house.

We're halfway there!
I was holding my breath waiting for the stairs to go in. Yippee! Measurements were correct. It's looking great.
ReplyDelete