

It also didn't hurt that the room we had earmarked to be my office happened to be one of the smallest rooms in the house (that wasn't a bathroom) that didn't require major structural work. Made it seem so much more achievable to begin with the prospect of actually finishing it within our grasp!

So here is what we were starting with.

The ceiling had certainly seen better days, so it was going to need some serious work.

And the view from the verandah was no more inviting.

So where to start...
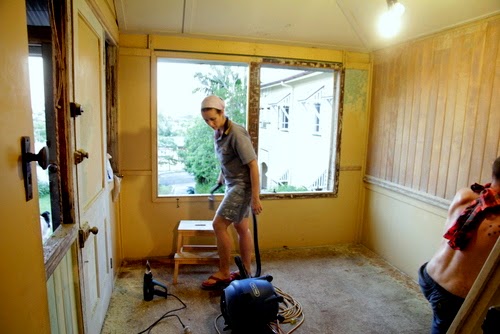
The peeling paint, the stained carpet... eugh!
We decided to leave the carpet where it was for the moment to protect the floorboards, and I started to scrape the paint off the window frame.

I even had a go at the wall to the right of the window with the scraper as well, as you can see from the blue-green patch on the top right of the above photo. It didn't take me long to learn that that was more pain than it was worth!
Tom got to scrape the VJ wall to the right of the windows...

And I attempted to keep the paint dust at bay with intermittent vacuuming...
And then attacked the windows themselves. They were NOT in good condition (more on them later).

Meanwhile, Tom plied me with cheese and biscuits through the gaping holes in the wall that removing the paint-peel-ey lattice left behind. You can see from the little bluey-green patches in this photo as well that I attempted some paint scraping on the VJ areas beneath the lattice gaps and on the back of the door. With varying degrees of success.

And then there was the ceiling.

It didn't take us long to decide that it wasn't the place for our little paint scrapers. You can't really see it in the photos, but practically the entire thing was peeling. Little teeny tiny bubbles of peeling paint. So either we had to scrape the lot or...
We had to get rid of it!
So we went with option 2.

And we decided to do the same with the wall that the window sits in as well.

So now with the room back to its skeleton, we had a fresh start. We bought some big sheets of fibro from the hardware store (and a fibro sheet cutter because we seemed to have lost ours in the house move), and started the slow process of cutting them down to size.

Now here's something. The process of putting up ceiling boards is SO much easier than it looks! I know from experience that this is probably true for almost every renovating task under the sun, but each and every board we put up shocked me. They're heavy, and holding them up in the right place while the other person nails them in is HARD!

Nevertheless, piece by piece, up they went. And we realised just in time that we should jam some insulation in there too.


Piece by piece by piece. Amazing how big a ceiling can feel in such a small room!

With the ceiling sheeted, we moved on to the walls. We decided to be super careful and glue both the wall...

And the fibro sheet...


Before then nailing them in. And it's clear that we tackled a lot of this after sunset. The poor neighbours.

As you can see, we removed the carpet when we finished paint scraping, leaving us with the lovely original floorboards. Not polished yet, but a million times better than the old dusty stained carpet!
With the exposed weatherboards on the wall around the door covered up with fibro, we moved our attention to the opposite wall, beneath the VJs that Tom had scraped earlier. The existing wall sheet beneath the VJs was considerably further recessed than the rest of the wall, so we decided to add some cheap bargain-bin lengths of pine to bump it out a bit...

And then glued and nailed a sheet of fibro over the top.

Finally we moved on to the window wall and repeated the process there. We were running out of sheets by that stage, so it required a bit of clever jigsaw puzzling.

And there it was! A freshly sheeted room! I can't even begin to describe how much cleaner it felt! Even with the coating of dust on the floor.

So how about a before and after? Even if the 'after' is really a 'during' since we're not even remotely finished yet. At least we've moved past the yellow though, right? Give us a bit more time to throw some trim and paint at it and we'll blow your socks off! Hopefully.


No comments:
Post a Comment