
Those wobbles relate to our front staircase.
Allow me to explain. A long long time ago, we can still remember...
When we first concreted in the steel brackets to support the posts that would then support our staircase, we concreted them in based on the height we expected our front yard to be eventually. That height was higher than the original ground height, so we devised an extremely sophisticated system to hold the concrete up higher than ground level.
Empty paint tins.

Then all of our height dramas happened (see here), and now our front yard has to be back down at the level that it was originally.
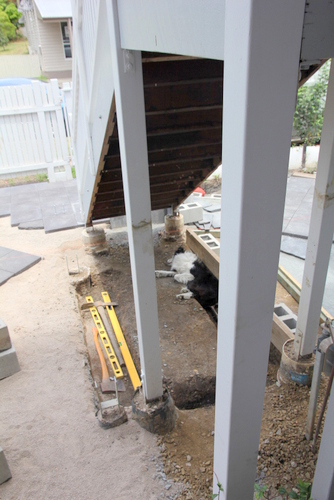
And as you can just glimpse from this in-progress paver shot from last week, the lower ground height means that the little blocks of concrete holding up our staircase are now exposed.

Which justifies our fear that our staircase will get the wobbles!

So something had to be done to ensure that our staircase posts weren't going anywhere.
We decided to temporarily make the staircase even more unstable by digging a big trench underneath it, so that we could then concrete in big channels to link up all of the exposed post footings. Actually Tom did all of the hard yakka digging. I just happened to find a photo of me with a shovel in my hand, so I can now take all of the credit.

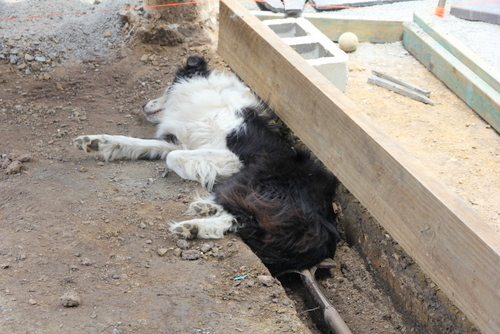
In fact, just for fun, let's back up a step and have a look at the first photo from this post above. You can just spot the little trench dug up under the stairs. On one side it has an axe and two yellow levels sitting in it. On the other, there's a sleeping dog!
Yes, Allie promptly took ownership of the trench and claimed it as her sleeping spot. Note that she is actually sleeping with her bum resting on an upturned shovel head. Love that girl.

Unfortunately those same tradies didn't leave any convenient little plastic reo-bar-holding-thingies behind as well, so we improvised and cut a leftover plastic plumbing pipe into little pieces to hold our steel bars up off the ground. The reason for this is, for them to do their job correctly and provide the concrete with support, they're best being located fairly centrally in the concrete rather than on one edge. Makes sense when you think about it, huh?

Up in the area beneath the stair landing we decided to run a similar trench around the edges to link all of the exposed concrete stumps together, but we arranged some spare blocks in the centre that we could later remove to prevent the entire area being covered in concrete. The reason for that is because that area is plumbing central, and it would be great to have access to the buried pipes there in the case of future issues.

And then came the fun part. The concrete-making (thanks to our lovely ex-neighbours Shaun and Tanya for the loan of your mixer... again!)...
Which Allie supervised very carefully of course...

And wheelbarrow by wheelbarrow, we began filling up the area under the stairs.
Mmm. Doesn't that look attractive?

Many many wheelbarrows later...

We were nearing the finish line...

And those stair posts ain't goin' nowhere!


Oh but we haven't talked about the front of the stairs! Here's the giant gap between ground level and the staircase that I've been harping on about. We decided to bridge it with a little paver step. So we positioned some pavers to form the riser of our new step and made sure that they were nice and level...

And then the creepy hand shoved some concrete blocks in from behind so that their tops lined up with the tops of the riser pavers so we could then put our wet concrete in all of the gaps to link it all together and make it nice and strong.

And the source of the creepy hand? Tom exercising his stomach muscles by perching his bottom on a paver we'd squelched into the under-stair concrete without touching his feet on any of the surrounding wet concrete. Yep, my husband is crazy. But committed. Wet concrete needs to be dealt with!

So I'm relieved to report that after all of this work, we can now be sure that our front staircase is once again strong, un-wobbly and stable and definitely not going anywhere! Whew!
No comments:
Post a Comment