

The front staircase essentially divides our front yard in half. There's this side near the driveway (this photo was taken from above on the front verandah)...

And after a bit of junk-clearing, this other side to the right of the stairs as you look at the house (this photo was taken from above standing on the landing of the stairs... front fence on the right, house on the left).

With the bulk of the inside jobs now done for our new downstairs area (that I'm calling the Granny Flat), it was high time we paid a bit of attention to the front yard. So I started playing around with the plans and figuring out what we might be able to do. I knew that I wanted to make the most of the fact that the area was divided fairly nicely in two, and make them look roughly symmetrical from above. I got a bit carried away, though.

Since making things easy is boring, I decided to make things super hard and designed the areas around pavers laid in circles as the focal points, with other pavers and garden laid around them. I figured that maybe someone somewhere would have come up with a way to make it easy to lay pavers in a circle by making kits with pavers all cut to the right sizes! Apparently I was dreaming.
That doesn't exist.
So, I had to revise my plan, and we came up with the option to replace my paver circles with diamonds! Tom loved that idea because it meant that there would be no need to cut any of the pavers, thus making the process of laying them much easier!

So we asked him to spend an extra couple of hours moving dirt out of our front yard, since the council had dictated that the finished height (i.e. top of paver height) of our front yards couldn't be any higher than the natural lay of the land. Because we'd brought in dirt previously thinking the opposite, that we'd have to build the front yard up to the height of the house's slab (see here for the reason for the change), this was a bit frustrating. But what can you do? Roll with the punches!

Whenever we move dirt around Allie seems to feel the need to lie on what's left and protect it from removal! Or perhaps it's just a nice cool spot to lie?

Our carpenter let us borrow his dumpy level so that we could make sure that once we brought in road base and sand, our finished heights would be right. This was fairly complicated, since the staircase was in the way most of the time, and we also had to make sure that the yard would drain properly.
Laying out the four corners of each of our paver diamonds helped us work out which areas needed to fall in which direction around them.

And so that I would get my symmetry on each side of the yard, we also had to make sure that the two diamonds would line up with each other.

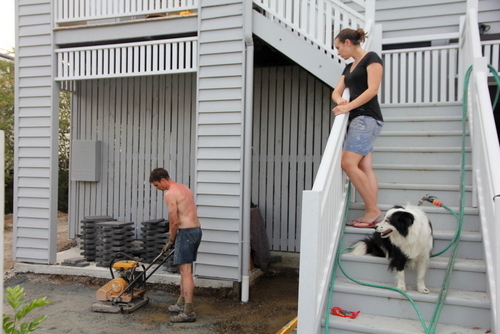
Then we hired a wacker packer for the weekend and began the process of compacting all of the road base on each side.

My job was to spray water on the areas that needed it before Tom ran over them with the machine, so I perched myself on the stairs with Allie. And I must say, spraying water at one's defenceless husband is a little too much fun!
And then, after our layer of road base was nice and compact, we brought in some more sand as a softer layer for our pavers to sit on.


Then it was screeding time...
Tom uses a big metal level to scrape the sand in arcs so that is flat and not-bumpy and also falling in the right direction.

And then finally it was paver time! That's the fast part!
We bought some charcoal-coloured concrete paver seconds at a discounted price from a local landscaping yard, and carefully selected the ones that were roughly the same colour as each other.

And then we dashed upstairs to admire from above. Unfortunately something went wrong somewhere along the way, because the diamond on this side of the yard actually ended up a little bit crooked, so its two centre points didn't line up with the house perfectly. We considered just leaving it like that, but we knew that every time we walked up the stairs that would be all we'd notice.
So, poor Tom picked up every paver and started again, trouper that he is.

And then we repeated the process on the other side (thankfully having already learned from our original mistakes).

The next area of interest was the little space between the two sides of the yard at the bottom of the stairs where the entrance from the front gate is.
We realised at this point that we needed some pavers with a bullnose edge to meet the front footpath, and also create an extra step up to the timber stairs, since they were a bit too high off our new lower ground level. Unfortunately I didn't take a picture that demonstrates that properly, but I'm sure you can imagine a giant step down from the last timber step.

And that was when we discovered that the pavers we had bought for our diamonds didn't have a bullnose option! So, Tom did a big ring-around and found some similar-looking pavers that did come with a bullnose option. They're actually a much nicer (and much more expensive) paver, so we figure that it's quite nice that we have the fancy pavers at the entrance.
To fit them around the front fence posts, we had to carefully measure and mark them, and Tom cut them with the grinder.

And they fitted beautifully. Thank goodness!

And it didn't take long to get the rest of them (that didn't need cutting) laid.

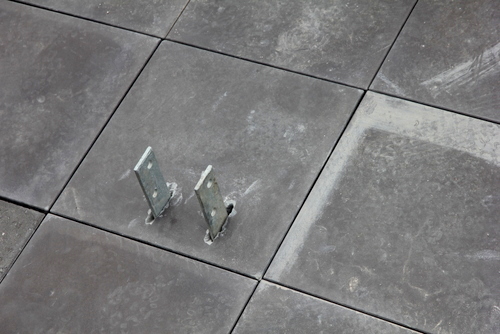
Although there was one that Tom had to give a bit of TLC to, so that it fitted around the steel fence post bracket that we'd previously concreted into the ground. You can just see it next to the timber level lying on the ground next to Tom in the above photo. More on that later.
In the meantime, it feels great to have a good start on making our front yard less of an eyesore!

We've still got a way to go, though!
You guys are doing such a great job, that paving will give it instant curb appeal! I cant decide who is the better site manager ... you or the dog :D
ReplyDeleteLol! Definitely the dog! Although she does have a little problem with sleeping on the job. Thanks very much for the vote of confidence, Michelle!
Delete