
I know, I'm sorry, I really couldn't help it.
With the time pressure of the tenant moving in, we've been working like crazy people trying to get everything done in time. So we've been doing about six jobs at a time, moving from one to the other as we wait for paint to dry, or when the sun moves so that we could work in a different area of the yard without melting, or who knows what else. No kidding. This is what my to-do list looks like.

So as much as I try to blog about only one thing at a time, real renovation life doesn't fit in a nice, neat little before...during...after progression.
Which means that sometimes you get little sneak peeks of other jobs that have been done in and around whatever I'm blogging about, that I haven't had a chance to mention yet.
Maybe we should turn this into a game. Spot the secret job completed!
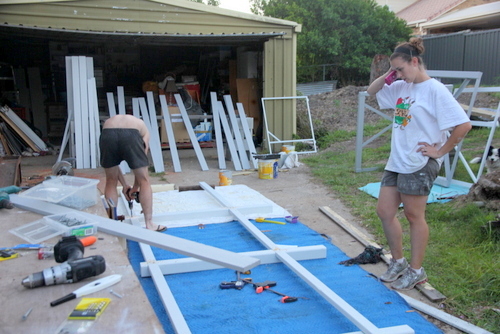
I've got the first challenge for you... this shot from yesterday's garden creation.

Surprise! There's a fence between the garden bed and the stairs, dividing the front yard in half!
Here it is from the other side of the stairs. As you know, our intent all along has been to give the little unit downstairs its own private little front yard, so the easiest way to accomplish that was to simply run a fence down the middle beside the stairs.

We didn't want it to be a really solid fence (and I really didn't want to have to paint all of the palings it would require to do that), since one day we might sell this house to someone who wants to use both the upstairs and the downstairs areas themselves, so our fence would need to be removable to allow them easy access.
We toyed with a few different ideas, but settled on a design where we would have ordinary fence posts bolted into steel brackets in the ground (like this one that we had to pave around near the front gate - see here)

And then we could run horizontal timber beams between the posts, top and bottom, and attach some wire to cover the gap in between. Is that confusing enough? Don't worry, I'll explain.
Tom had some peaceful alone time while he notched out sections of each post to house the horizontal beams.

And then I had my own peaceful alone time painting all of the various bits and pieces while Tom moved onto something else (probably concreting), which of course I didn't get photos of.
And then it was assembly time! This was pretty late in the day, so both our light and our allowed noise-making time were running out. Can you spot our little canine supervisor in this shot?
We pre-drilled and then screwed each of the horizontal beams to each post, carefully measuring the distance between the posts first so that it would line up with the distance between our already-concreted-in steel stirrups that the posts would be bolted to...

And I followed with a little paintbrush to paint over the screws so that everything would be the same colour, because once we attached the wire I wouldn't have much access.

And as you can see, we then rolled out the wire ($20 for a 5m roll in black powdercoat from Bunnings), and it was time to attach it. We bought some little galvanised staples that were basically just little pieces of metal in a "u"-shape with sharp pointy ends. We hammered each one in at intersections of the wire, trying to hammer it outwards so that it would pull the wire nice and tight. Wish I had photos to explain it, but we were fast running out of time to make hammering noise, so we were going like the clappers! No time for frivolous photography!

But we got it done! Just! And carried it into the front yard to test its position before we signed off for the night.

We can't quite call it finished, though. Not only are the posts not actually bolted in yet, but you also can see that there's a fairly large gap between the bottom rail where the wire stops and the actual ground level. Allie can wander through there almost without crouching at all, so we have to add something extra at the bottom to actually make the fence dog-proof.
Meanwhile though, can you see something else peeking out in the corner of that shot above? Surprise! Yet another sneaky job that I haven't mentioned yet!
It's a tricky one. See we hadn't designed our wire division fence to make it all the way from the front boundary to the house. It made it as far as the posts holding up the landing on the stairs, but no further.
So, I set out to fix that. I added top and bottom horizontal rails using little steel brackets to attach them to the landing posts.

And then popped around the other side to attach a level so I could get a consistently straight line for my...

Fence palings!

We had decided that for a little more privacy right near the downstairs front door, we would make that area a bit less see-through than the wire fence. So when I was painting all of the fence bits and pieces, I also painted eight fence palings in readiness for this job.
And then I screwed them all in ALL. BY. MYSELF. Man I'm good!

So looking from the other side of the yard, privacy accomplished! Hooray!

So knock a couple more jobs off the list, we're getting closer! Of course now that our dividing fence is in place, we've got a little problem. The dividing fence, combined with replacing the section of front fence that we temporarily removed so we could get soil in, completely prevents all access into our lovely new garden area!

Well not ALL access...

While rolling under the dividing fence does have its advantages... it certainly offers a pretty great view of our lovely painted house...

It's not exactly an ideal way for our new tenant to get to her front door.
Perhaps a second front gate might have to bump up the priority list?
No comments:
Post a Comment