

When we first painted the office, this was the view of where that wall would go.

But this isn't going to be just any old wall. It's going to have these gorgeous guys in the middle of it! Back in the old ages when we first moved in to this house, we went door shopping (see here), and for the grand old price of $800 we nabbed us two matching pairs of beautiful hardwood French doors, one pair for the office, one pair for the lounge room. And a year later we're finally getting them out!


So! Where to begin?! With the one little VJ board we only just remembered to sandwich between the shelf post and the house post while we were building the shelves.

We went scavenging in our shed for some more VJ boards to make up the non-door-filled sections of our new wall.We had quite a few shorter ones leftover as either offcuts from other VJs that we have cut, or from the other wall of the office where they used to sit above the doorway that we moved for our bathroom and then closed in.

So! We carefully cut the angle for the roof along the top of each board, and then cut the other end to slightly-longer-than-we-thought-we-needed lengths (just to be on the safe side).

And somehow, we just managed to have enough longer lengths stored away as well! We had obviously bought them for some reason before, I have no idea what for!

And then it was finally time to start creating a wall out of them! The boys slotted the first one into the sandwiched VJ...

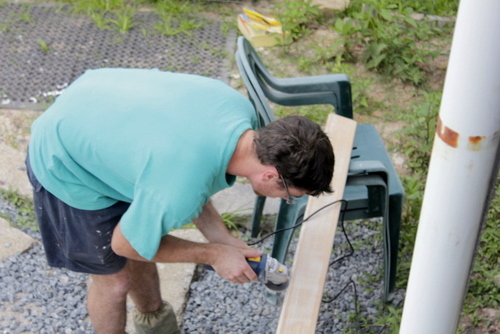
Or tried to. Our paint scraping efforts obviously weren't quite thorough enough, since this particular board had a whole lot of old gunky paint stuck in the groove, stopping it from slotting cleanly into the other one. We had to break for Tom to grind out the obstruction...
And then the other boards went up in virtually no time!
And then we could install the first door post.

Which took quite a while with regular intervals for this.

Tom and Daniel have recently developed an obsession with this guy, and his perpetually-smiling caroling.
And now I'm serenaded many times each day with their version. This is my usual response.

Anyway! The boys did finally get back to work, making some quick adjustments to the lengths of the long VJs using the circular saw out the window. We don't recommend it. It was just laziness, to avoid having to go outside to do it. Don't try this at home guys, it's not very safe.

And we started fitting them in on the other side of the wall.

We attached another timber post to the existing wall, and then the VJ was screwed into it (with Daniel nearby on the vacuum cleaner to deal with the mess). Sorry about the bad focus in this photo!

And again, in almost no time, the VJs on both sides were up!

Allie spent most of the time keeping a wary eye on the neighbours. And yes, you can see that we haven't yet finished the railings on our stairs! We seem to find it hard to focus entirely on one job and complete it, and get distracted with other jobs that take priority. Like my office. Hmm.

Because we'd made the probably-not-the-most-sensible choice to put up the VJs on both sides of the wall first, we decided that we had better try fitting in the little VJs (the ones that would go above the doors) between the two sides, just to see if we would have to cut one of them awkwardly in order to fill the gap neatly.

And amazingly, it's incredibly close!

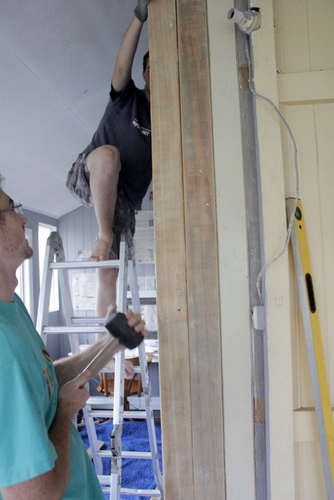
With our minds a little eased and both sides of long VJs locked in, it was time to lock in the doorway. The boys notched out the two door posts and the top beam so that they slotted into each other nicely (you can see the notching out of the top beam in the above photo)...

And Tom got up on his ladder under the house to screw in the base of each of the posts neatly to the floor.

Then, we cut a board leftover from our shelves (it was the perfect depth) to copy the floor plate along the existing wall, to help the door post and VJs to lock in together on the floor.

For some strength at the very top, we cut some timber pieces to fit along the ceiling, bracing the two door posts.


And after what felt like a loooong time, the step I'd been waiting for! Finishing the cuts on all the little VJ's to go above the door...

And then attaching them to our beams above the door!

Last one...

And...after also attaching two little horizontal pieces to each section for a bit of extra bracing and to match the existing wall... the office officially had a fourth wall!!!!

We're pretty pleased with ourselves, let me tell you!!!! Of course it's not the prettiest yet... I'll get to that shortly. But still, we built a wall! Woohoo!
No comments:
Post a Comment