

But we didn't stop there! In fact, even in that shot above you can see Tom holding up pieces of architrave in place around the doorway.
I nearly gave up hope of being able to match the existing trim in our house with new trim. I tried the demolition yards and Bunnings without finding anything that even remotely resembled our stuff, and eventually I made my way to Finlaysons, a fancy timber yard. The very friendly salesperson there went searching for a matching option for me, and we were just about to give up when I spotted one up high that might just work. As it turns out, it was perfect!
We have actually saved some of the trim we've removed from other doorways in the house to reuse, but we've earmarked it for other purposes, so our new office doorway needed new trim for both sides.

It's amazing how much prettier a doorway looks with the architrave/trim around it!

We decided to pop screws into the deepest valley in the trim, thinking they'll be the easiest to putty over and disguise there, with the shadows all of the nearby raised sections cast, which turned out to be a good decision.
Unfortunately I let us down another way. I didn't quite allow enough length in our cuts to handle the 45-degree cut in the corners, so we ended up with a little bit missing on one corner. Darn. Keep reading though, we managed to solve that problem.

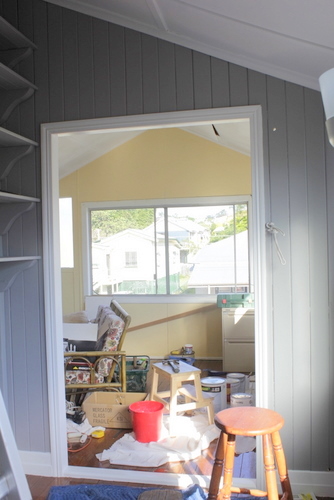
We moved on to the other side of the wall, which was looking like this (before the ceiling was painted, obviously).

Before we put the trim on, I gave the wall a good undercoat with the grey undercoat that I accidentally painted the shelves with, hoping that it might be enough that we would only need one coat of actual paint colour over the top of it.

Then came the tricky part. We had to try to create a proper doorstep and doorway on that wall. Fortunately for us, we had a ready-made doorway leading into the lounge to try to copy! I must say, I've never paid that much attention to a doorway in my life before!

And so we created this! Looks pretty simple and easy, doesn't it?! But we discovered that nobody sells pieces of timber that look like this for doorsteps! So we decided to create our own. The doorstep itself is actually made up two pieces of timber. Tom got a wide one to go on the bottom, and cut the corner off one long edge, then sanded it nice and smooth. Looks fantastic, doesn't it! The higher section of the step is a separate piece of timber that we got with one edge already rounded. Combine the two, and voila! A doorstep!

As an added bonus, we realised that the trim we had attached to the door posts that ran straight to the floor (and was a little bit too short on the top angle) actually had to sit on top of the doorstep in order to match the other doorway we were copying. Hooray! Although it did involve the hassle of taking the trim off again, we got to trim a little bit off that top angle to raise it up a bit, which meant we no longer had the missing corner problem!
We (i.e. Tom) screwed the doorstep into position once and for all...

And attached the trim on the inside of the frame.

And we found a piece of timber to put on the inside of the frame for the doors to bump up against. Thank goodness we had the other doorway to copy, or we wouldn't have been able to figure this out! We could only find pieces that were 60mm wide in Bunnings that were also the right depth, so Tom actually cut 5mm off to leave enough room for the doors at the front.

Since I wrote that and it still sounds like gobbledygook, hopefully this little diagram helps explain it a bit better. Our door posts (in black) are 70mm, and on the inside are the VJ wall boards (yellow), which are 20mm, making a total of 90mm. Our doors are 35mm wide, so in order for there still to be enough space for the doors on the outside of the door post, our board on the inside of the frame in green, needed to be 55mm. Nice and neat!

Unfortunately all the various pieces of timber we were attaching together still left a few tiny gaps between them, which of course we couldn't stand. So I attacked the entire doorway with Selleys No More Gaps...

And then gave them a couple of coats of gloss white paint (along with the cornices and trim as well).

I made that sound so easy. Just "gave them a couple of coats"! Actually, that was my very first time attempting to paint trim (without any painters tape) without getting glossy white paint over everything. It involved way too much time climbing up and down a ladder battling with the only angled brush we haven't yet ruined. Here's a tip. Learn from my experience, and GO AND BUY A NEW ANGLED CUTTING IN BRUSH! It makes being neat SO much easier!
Nevertheless, look how pretty!

Then, to finally be able to call the wall finished (although is it finished if the doors aren't on yet?), I gave the wall a coat of paint in the same colour as the other walls (Taubmans Inverness), and it was done!
Thankfully my hope that one coat of paint over the grey undercoat would give us enough coverage was fulfilled, so we still have a bit of paint leftover in the Inverness colour for future touchups. Woohoo!
Doesn't it look lovely with the crisp white trim?


And a last pretty shot looking up from the doorway to both our shelves and our painted cornice! Aahhhhh.

Can you tell we're pretty proud of ourselves?
No comments:
Post a Comment