
While I continue to chat with cabinetmakers and dither over the layout of the downstairs kitchen, I thought I'd finally take a baby step towards making our upstairs kitchen look a bit more finished.
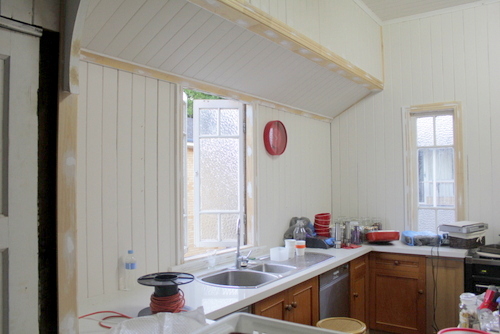
The last shot I left you with was this one, when I finished putting up nearly all of the trim around the windows and doorways.

The operative words there were "nearly all of", since there were a few bits that still weren't quite trimmed up, like this section here, where you can see that unpainted patch. We had hung the little kitchen TV on that wall there (where the unpainted dark brown patch is) before we painted the wall. And I put up the corbels that used to live in the old lounge doorway.

What was preventing me from being able to add the trim though, was this bolt, leftover from when we put an extra post in that corner. As you can see, it sticks out from the wall quite a bit.

So I set Daniel to work with the grinder. Sparks inside the house always make me a bit nervous...

And after just a few seconds of work, we were left with this (the green tape is just taping a bit of protection over the nearby powerpoint - better taped than electrocuted, I always say).

And then I quickly chopped a piece of the trim to size, and popped it in place.

Here's a closer shot of it. It's now the piece running vertically and meeting up with that extremely awkward corner where all of the trim intersects.

That corner was definitely still looking very awkward though, so I pulled out a right-angle piece of trim that we'd bought at our last trim shopping expedition to Bunnings, measured up the height of that wall above the beam, and covered up that unsightly corner. A whole heap of No-More-Gaps worked wonders on the rest of the gaps (and my shoddy cutting job in the spot where the two fancy trim pieces meet).

I gave the opposite corner the same treatment (which also included a little rounded piece in the section where the wall meets the angled ceiling section.

The rest of the trim got a putty once-over as well, and then I had the joy of sanding Every. Single. Little. Patch. Of. Putty. With the vacuum cleaner in my other hand. That part is not fun.

So then the kitchen looked like this (please ignore the mess, without those wall shelves up I still have bits and pieces all over the counters).
And then, after I wiped it all down with a wet cloth, it was painting time.

Three joyous coats of painting time.

I undercoated it all, and two coats of plain gloss white later, it looked like this!

I dragged out the wall paint to coat my extra corner coverage pieces.

And if I say so myself, I think they're doing an excellent job!

It's a relief to finally have the window sill painted. What with splashes from the sink and moist air from the window, it was beginning to look a little weathered.

I can't believe how long I waited to slap on that bit of paint to finally make the kitchen look like this!

So how 'bout a few befores?
Before paint...

Before trim...

Before any kitchen-related bits and pieces (and window relocation)...
And now, the after!

Those timber cabinets are just pleading for their own coat of paint. I really must decide on a paint colour once and for all and just DO IT!
No comments:
Post a Comment