
They're railings that take a ridiculously long time to put up! Considering that our stairs span a total height of roughly 3.6 metres, it was important that we get to railing stage, so that people visiting us didn't risk falling to their deaths.

We paid a visit to Bunnings to buy the bits and pieces, and began experimenting with the right angle to cut each one to size.

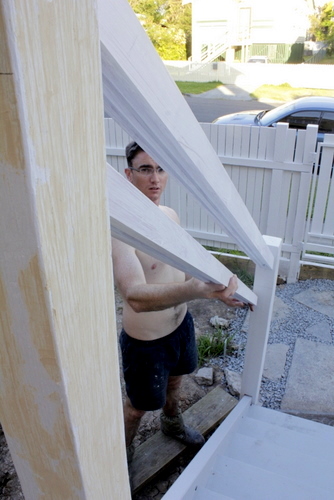
We initially thought that it would be a simple matter of just holding the railing piece up against the angle of the side of the stairs themselves, but because most timber isn't perfectly straight, the distance between posts at the bottom there was actually different to the distance between the tops of the posts.

So, after much fiddling, we realised that if we measured up the same distance from the bases of the two posts (where they meet the grey angled timber), we could then get the correct length for the railing, and make sure it was completely parallel to the stair angle. Duh! Just as well it only took us two hours to come up with that pearl of wisdom!
It was then a matter of holding the railing up against those two lines in order to get the angles perfect.

The concept sounds quite simple, but since nothing seems to be perfectly straight, we figured out that the easiest way to make sure the railings fitted perfectly was to cut the angle on one end and get it entirely gap-free, and then mark the angle for the other end.

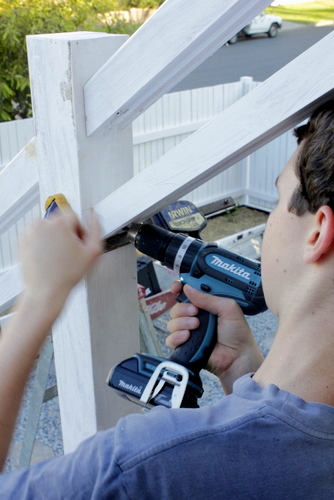
We decided that the best way to secure the railings to the posts was with screws. The boys tried their best to sink the heads of the screws into the timber enough that I can putty over them so they're almost invisible.

Because it took us a really long time to work out a system that we were confident in for cutting the railings to size (although things did get a bit speedier once we figured out that magical measure-same-distance-up-each-post trick), we only managed to get the very top railing done before our noise curfew hit for the evening.

Did you spot our little quality checker at the top of the stairs there?
We strung up that green rope half-way up just to make things a little bit safer, although the top railing made things feel almost completely safe anyway.

They're beginning to look like real professional stairs, aren't they?

The next weekend we came back for seconds. We set up the drop saw again, with Allie as minder...

And the process began again.
We're going for a railing that looks a bit like this (although a little less on the rustic side).
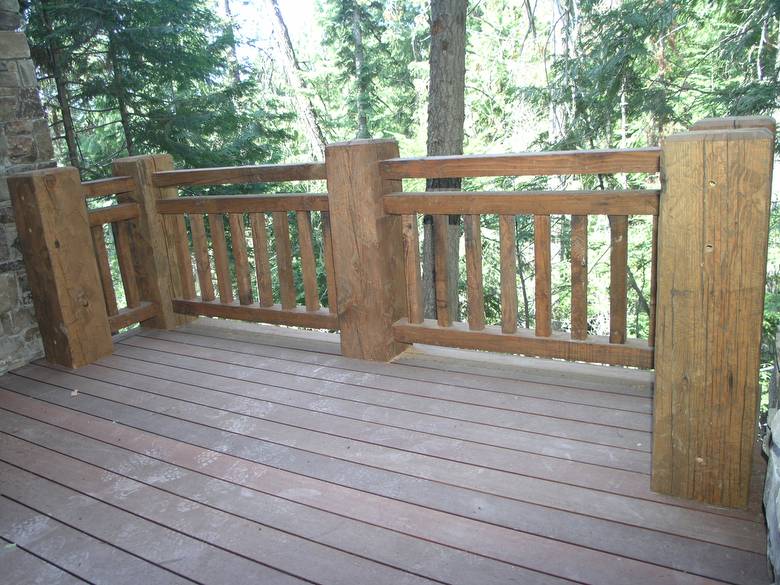 |
| Trestlewood |
So phase two of our project involved a second top rail, set 100mm lower than the top rail.
While we worked, Allie concentrated on spying on the neighbours from under the front fence.

Daniel took over the role of Chief Screw Driver.

Tom had his angle-cutting technique down pat.

And we were once again very careful to line up the angles perfectly with our line.

The landing was the easiest section. No angles! Just a re-measure of the distance between the posts, to make sure the rail would fit perfectly.

Because it was quite easy to cut the landing sections to size, we added the bottom rail as well.
I of course supervised this process carefully. This picture doesn't really serve any purpose except to prove that I do more than just wander around taking photos of everyone else doing all the work! Although I do look a bit like I've fallen asleep standing up...

Anyway...here are our stairs in all their still-incomplete glory!

It's turning into quite a lengthy saga! One little bit at a time!

At least we're making progress, albeit slow!
If you compare how it used to look!


Wow, this is awesome! Great job!!
ReplyDelete