Now we're moving back to our home office!
Since we painted it grey a few months ago, not much has happened in there. The pressure's on now though, since the company I work for is selling its office premises and going to a remote work model, meaning I will very soon be working from home and in need of an effective home office!
Lately, it's served as a general dumping ground for general junk.
I'm working on a proper desk for that wall (more to come on that very soon), but something else I'm going to need is shelving. And lots of it!
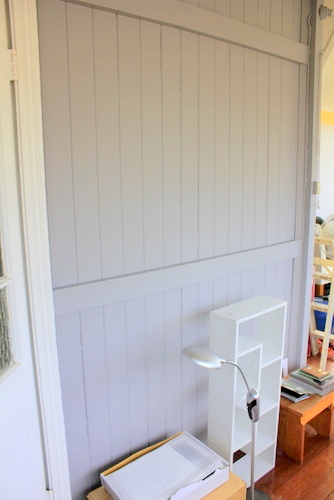
So we earmarked the wall to the right of where I stood to take the above photo as my shelving wall.
Because of the way houses like ours are designed, those vertical timber boards you see in the photo above are the wall (duh!). What I mean is, there isn't any wall cavity behind them. They're it. One side of those boards is in the office, the other side is in the lounge. Nothing in between! So we don't really want to put those poor boards under too much more pressure by mounting shelves straight onto those boards (not to mention the fact that screwing in shelves from the other side of the wall wouldn't look very good in the lounge room wall.
So, we devised a plan to get some nice solid timber posts to attach to the existing timber posts on either end of the wall (on the left it's the door frame, on the right it will become part of the wall that will eventually separate the office from the verandah). We're going to add a third in the centre as well, secured to the floor at the bottom and the ceiling at the top.
You can see the bare timber post on the left here, when we were trialing its position.
But in the meantime, we needed to figure out a few things. Most importantly, how to support the shelves themselves from the timber posts. And the answer? Brackets, of course!
You may remember that we had a surprising amount of trouble getting nice timber brackets for our kitchen shelves (see here), since Bunnings' only brackets had been discontinued, so we knew we couldn't search there for more.
I did some Internet trawling, and am disappointed to say that timber shelf brackets appear to be incredibly rare! Who knew?!
I found a couple of options on Ikea's website...
 |
| Sourced here |
 |
| Sourced here |
But they're $10 each, which is double what the Bunnings ones originally cost us! Since we need eighteen for our shelves, that's no small investment!
We briefly thought about this kind of bracket used for decorating the top corners of verandahs.
 |
| Sourced here |
But they're even more expensive, and not particularly structurally strong!
So I went back to the drawing board. And it occurred to me that it might be within our (i.e. Tom's) skill set to make our own curvy brackets modelled off the kitchen ones!
Tom didn't disappoint me, and was willing to give it a shot, so we bought ourselves a 3-metre-long hardwood timber sleeper (the kind used for outdoor retaining walls), and set about drawing up a design for our brackets.
We started off fairly simply, using the kitchen brackets as a template...
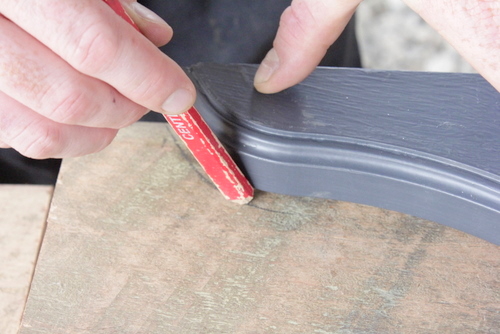
But that didn't quite look right, so we eventually settled for a design that involved drawing around the curvy ends at top and bottom...
And then we used the curve on the kitchen bracket to connect the two.
And we ended up with a template that looked something like this, with two opposing brackets contained in a rectangular section, so we could maximise the value we got out of our sleeper.
Tom enjoyed it a little too much, I think.
He clamped each little sleeper rectangle to the back of his ute with a clamp to keep it still, and put the saw to work.
Allie slept through most of the noise...
Although she did bother to get up at one point in order to go and stand almost directly underneath where Tom was working. And it wasn't quiet! She clearly has no respect for her own hearing!
By the time he was up to bracket number eight, Tom had the technique down to a fine art!
I took responsibility for sanding back each bracket to smooth out the rough cuts.
And at long last, we had ourselves a nice pile of nearly-identical brackets. We figure they won't be sitting right next to each other, so the unavoidable variation between them won't be too noticeable. Hopefully!
They're not going to win any awards for beauty, but they're extremely solid, and should do the job admirably!
And let's not forget that they cost a fraction of the other options I found! The original 3-metre sleeper only cost us $24, and obviously we get to keep the $80 reticulating saw that we bought, so we're still going to get more use out of it. The $10 blade is basically a write-off, so let's say the materials cost us $34 total. That averages out to only $1.89 per bracket! Not bad! Even factoring in the $80 cost of the saw they were still $66 cheaper than the Ikea options would have been!
Allie rewarded us for our ingenuity with Hi-Fives all round!
So now I'm one step closer to having a home office! The next step will be to cut notches out of the vertical posts so that we can slot the brackets into the post a bit for added strength, rather than simply suspending them off the front of the posts.


No comments:
Post a Comment