DIY Explanation

pour améliorer, meaning 'to improve', is a humble record of our renovation, home improvement and landscaping projects, with our travel adventures thrown in.
Showing posts with label Ensuite. Show all posts

03 May, 2013

Streaky Glass and All

So who wants to see the actual finished photos of our ensuite in all its glory, instead of just getting close-up snippets while we install towel rails etc?

Well let's not keep you in suspense?

Ladies and gentlemen, my pride and joy...


And here's a more moody version of that above shot where that streaky shower glass (totally my fault) is slightly less obvious!


We wanted this bathroom to tie into the other main bathroom nicely, hence the same use of the black ceramic pinstripe tile for a feature wall and the creamy porcelain tiles everywhere else. But the main tie-in is that mirror that mum gave me that I spray-painted silver! And the little black damask pattern in the glass of the entry doors don't hurt the theme either!
 

Let me just backtrack for a moment though, and gaze at that pedestal vanity for a moment. I had mentioned that I searched for the narrowest one that I could find, since as you can see, it only had a very little slice of space to squeeze into before it would hit the shower.


But it was not our first choice of pedestal vanity. This one was.


Yes, you can see why we didn't end up using it, huh? We got that pedestal (and the matching vanity basin that Tom is holding here guiltily in the aftermath of having broken the pedestal) when we bought all of our second-hand kitchen cabinets, claw-foot bathtub and dishwasher. The seller threw in the vanity for free, and we were thrilled!

But then somebody accidentally broke the pedestal...


At first we just planned on buying a new pedestal to sit the little vanity basin on, since it was in good condition, but in the end that would have required us to make two sacrifices:

1) The basin would have needed more space, so either we would have had to squish an already-very-narrow shower, or we would have had to move the vanity a little to the left, preventing it from being centred off the doors. Neither was really an option.

2) The basin was designed with two tap holes. These days basins usually come with either one (for an all-in-one mixer tap fitting) or three (for a spout with a tap either side). The obvious reason for that is that it's nice to have the option to have a combination of cold and warm water coming out of the one spout, not cold out of one, warm out of the other. So not only is it pretty darn hard to find attractive tap fittings to fit a two-hole basin, but it's a pretty silly arrangement, really. So aside from drilling a third hole in the centre there for a spout and hoping that we didn't crack the porcelain, we couldn't really use that basin.

So, in the end, not so much harm done! We instead bought ourselves this lovely little slim-line vanity for no more than $150 and were done with it. Oh that streaky glass!!!!!


I think it's a very good thing that we're now going to move on to a new place. I committed hard to the style that we chose in the main bathroom here (I'm going to name it Dramatic Chic), and had to continue it whether I was still committed or not. And to be honest, although I still love it and wouldn't change a bit of it, I'm really ready for something new. Perhaps less dramatic. Or chic.

Who can't wait to get started on the new place???!!!!

26 April, 2013

Suite Dreams

I'm running out of ensuite puns, clearly!

And now that song is in my head.

I just searched the word "ensuite" on this blog to figure out what I last showed you, and shame on me, it was this as the tiling was finished. Back in December last year!


For shame! That was more than four months ago, and throughout most of those months we have been happily using it as a fully functional bathroom! So how about I show you what it looks like, at long last, huh?

The plumber came and fitted everything together... the narrowest pedestal vanity I could find, the shower head and taps...


And of course the toilet. This shot does really well at showing you the total space in this room. It's only about 2 metres wide and 1.5m deep, but we did our best to make the layout as un-cramped as possible (while still getting the shower as big as we could).


Despite those priorities though, there was one thing I wouldn't budge on, and that was that the pedestal vanity HAD to be centred off the doorway to the room. That squeezed the shower a little bit, so it was only about 700mm wide. But with a 1.5m length it's still workable.


And with all of the bits installed, our glass man came and installed a lovely semi-frameless shower screen to contain everything, and we were set!


And you can see that the stained glass window reflected in the glass of the shower door looks pretty good with that strip of black mosaic tile.


So once all the main bits were installed by the professionals, then came time for us amateurs to add all the extra things... things that prevent you from having to keep your toilet paper on the floor and your towels hung over the shower door.

So, we huddled around the vanity.


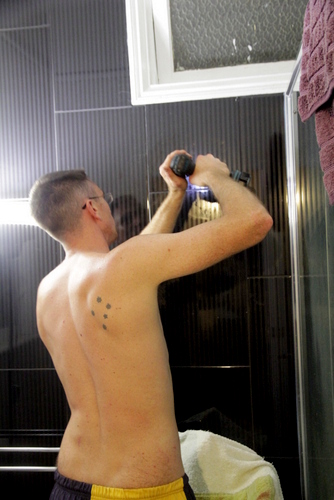
More specifically, we huddled around the vanity, Tom putting all his weight into drilling through the tile, me using a little squirt bottle to squirt his drill bit so that it stayed effective.


Repeating that process numerous times allowed us to then do this... install the brackets for our various bathroom paraphernalia...


And slowly things started coming together... voila towel rail!


I obviously didn't thing the toilet roll holder was worthy of being photographed, sorry. Next item was a mirror to go above the vanity! Repeat hole-drilling process...


But let me go back in time a little bit and discuss my mirror of choice. As you know, I found this mirror on Ebay for our main bathroom and spray-painted it silver.


Well about a year ago, my mother commented that that main bathroom mirror looked a lot like one that she had been given as a wedding present years ago, that she had never even really brought out of its packaging. Since I would need a mirror for the ensuite, she offered to gift it to us!


As much as it would give us the matching-ness between the bathrooms that we were looking for, I was a bit worried about manhandling (i.e. spray-painting) one of her wedding presents! But she insisted, and I wanted it too much to fight too hard against her, so this mirror began its new life!

I flipped it over and removed the glass from the back...


And puttied any strange holes or imperfections in the main frame.


Then I gave it a quick hand sand and perched it on an old drainage bin for a few spray coats. This was after the undercoat.


And then a couple more chrome spray coats and then a clear gloss coat later, we were left with this!


Which we then hung up on the wall above the vanity, giving us a little bathroom that was begging for some "mirror, mirror on the wall, who's the fairest...." action.


But we weren't quite finished yet. The one thing we were missing in this little room was storage. Any storage. So, at my last visit to IKEA, I invested in some black $9.99 EKBY VIKTOR shelves and $5 EKBY VALTER brackets so that we could put up some shelves above the towel rail on the black pinstripe tile wall.

And then there was more drilling.


We decided to cut the back off the shelves to make them shallower, since the last thing we want is to make this small room feel smaller by adding too many things at eye level.

And unfortunately my picture-taking commitment appears to have disappeared around about now, because this is the only shot I took of one of the shelf brackets installed in place. At least it demonstrates that their black-ness camouflages them against the wall!


Proper finished shots of the ensuite should come soon, but for the moment, let's enjoy the comparison with what it used to look like, shall we?


Related Posts Plugin for WordPress, Blogger...