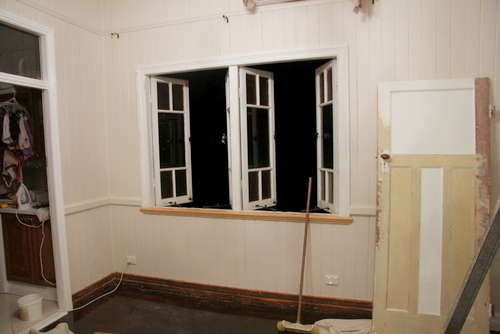
So the windows... OMG the windows!
This is a LONG post (43 photos!). But surely you'd prefer to just get ALL of the upstairs windows done in one giant post than have me talk about windows non-stop for the next two weeks, right?
So shall I list all of the windows that need painting for you? Let's work our way around the house in a clockwise direction! Doesn't that sound like fun?
The office windows (just undercoated so far)...
And the new section of wall beneath them that has been cleverly hidden by my printer cabinet...
So I painted them (two coats of gloss).
And the wall beneath. Can you spot me in this mess?
So then the office looked like this. Yay!
But no time for rejoicing. Get back to painting!
So then there's the bathroom window. Like the office windows it's brand new. Unlike the office windows, I haven't even undercoated it yet.
And the frame around it is definitely not brand new, so it isn't in the best condition.
So I gave it a bit of a paint-scrape...
And a sand...
And then I painted the window and its frame. Three times.
And forgot to take a proper picture of it fully painted. So you'll just have to live with this fancy shot that clearly shows that the window is no longer natural-timber-coloured.
Office down. Bathroom down. Now the laundry!
Unlike all of the other windows in the house, it's a little single-hung window. And it is NOT in good condition.
This is where I had to start a bit of a fight with myself. I'm a perfectionist. I hate looking at something and knowing that I've taken shortcuts and I could have done it better. The problem with the windows on this house is that really, to do them properly, I would need to completely strip back all of the paint and start painting them again from scratch. That's a LOT of work. And we've got a deadline!
Ain't nobody got time for that! So I have to compromise. And I hate it. Because attempting to
partially scrape these windows is like pulling a loose thread on a woolly jumper. The whole thing starts unravelling. And getting that delicate balance of just-enough-but-not-too-much-and-as-fast-as-possible is HARD!!!
Particularly with an old blunt paint scraper.
And I have no idea what happened to our safety gear. I improvised with a tea towel and sunglasses. Good look, huh? Particularly with the fuzzy all-over-the-place-and-I-couldn't-care-less hair!
Oh, and the tea towel was held on with a bulldog clip. Am I resourceful or what?
Okay, office supplies aside, I got the window mostly scraped.
And then I painted it. Three times. Whew! Laundry down.
Next up, the dining room windows! I've had those breezy IKEA curtains hanging in front of the dining room windows for months now to partially obscure those panes of yellow glass that I'm not a huge fan of. First things first, they had to come down.
Then, before painting, we wanted to deal with this rusty, messy old window hardware.
So we replaced it all with fresh new stuff.
And then came the painting.
In fact before painting, it was paint scraping.
And this is finally where we got smart. Instead of attempting to tackle it with the ridiculous old blunt scraper that made me want to curl up in a ball and cry while nursing my bleeding fingers, we actually took ourselves off to Bunnings to see what smart people who want to scrape paint do. And amazingly, they don't do what we'd been doing! So we came home with a heat gun and this beauty.
It's got some kind of fancy diamond blade, and I am completely in love. It snarls its way through paint like it's butter. There's still some elbow grease involved if you want to go all the way back to bare timber, but particularly when I hit an area with the heat gun first, it's amazing.
So here I am, paint scraping by the light of the moon.
So with the dining room windows and their frame at that it's-good-enough level of paint scraped-ness, I followed with puttying any not-so-pretty bits (like where the old window hardware attached)...
And then painted. And painted. And painted.
Are you sensing something of a pattern here? Well we're still not done yet! Stay with me here! And just imagine how claw-like my hands were getting painting each of those little timber strips on each window!
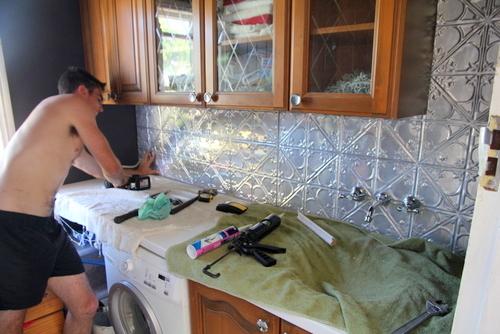
So now for the kitchen!
Those windows that we put above the kitchen sink weren't original to the house. We bought them at a demolition yard, and the paint, particularly on the left window, was really badly cracked. I scraped off the area in this shot with just a screwdriver.
But first things first, since this window has a tendency to flap open and then bang closed if it's not secured, new hardware!
But rather than going through the gory details (marking, pre-drilling, screwing, it's not rocket science), let's cut to the lovely hardware-installed after shot! Hurrah!
And then the painting. Sigh. But first the paint scraping! I ended up taking back that left window to bare timber, mostly. The right window wasn't doing so badly.
And THEN the painting. This window involved the most uncomfortable painting positions I have encountered to date. Try perching over a sink and trying not to put too much of your weight on the thin sections of benchtop on the front and back of it!
Hooray! Finally painted!
The other two windows either side of the stove and rangehood got the same treatment.
Aaaand moving on.
Bedroom two. One little window pair. They don't look too bad from afar.
But up close, particularly the window sill, that ain't pretty. Some idiot painted right over some partially peeled paint, so there's nothing for it but to strip it back if I want a nice smooth finish.
So strip it back I did.
Sanding, undercoating, painting painting.... and done! Man I wish it really happened that fast!
Okay! So the final room on our clockwise tour of the house is the master bedroom! With SIX lovely windows to deal with! So we shuffled the mattress out of the room, draped up the curtains out of the way...
And I got my scrape on again.
And Tom actually removed those front windows so I could get better access to them for some scraping action (and so he could cut off some extra length that was stopping them from closing perfectly). Allie was happy that the action was finally down at her level so that she could supervise my technique properly.
So without any windows on the front of the house, we decided to set up our mattress in the dining room. It was fun! Like camping, but with all the creature comforts!
And I kept painting. And painting. And painting.
When I had FINALLY finished painting, Tom re-installed the windows again, and we put up some security bars for a bit of added security. It's a two-storey window so there's not a high likelihood that someone would manage to climb in, but particularly with the bed in that spot, it wouldn't be too hard for someone to fall out of that window! So we nabbed ourselves some second-hand bars from a demolition yard, sprayed any less-than-perfect bits white, and now no-one will take a quicker-than-desired trip down to the front yard.
So that's it! At LONG last, we can call these windows DONE!
Who else is relieved?