DIY Explanation

pour améliorer, meaning 'to improve', is a humble record of our renovation, home improvement and landscaping projects, with our travel adventures thrown in.

13 March, 2012

Back to Base-ics

I'm so very very excited! Not only are we very very close to having a concrete slab finished under our house, but we've committed to another slab as well! Of rock, this time.

Last week we put the order in for a fabulous new benchtop for our kitchen! I'll provide more details of that process soon, but there are a few basic things we had to do before our kitchen would be benchtop-ready.

Notice anything missing in this picture?


Here's a hint. We had to build one when we put our little IKEA cabinet fillers in on either side of the stove.


It's a base! Our long peninsula cabinet and wine fridge need to be raised up by the same height in order for a benchtop to be able to run at a consistent height across the whole kitchen.

We took all of the measurements of both the wine fridge and the peninsula cabinet, and drew up a plan for a base for each.


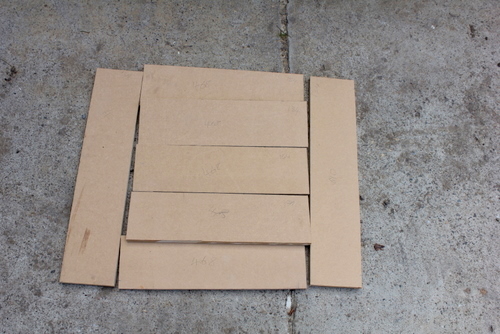
Fortunately we had enough MDF board leftover from building the other cabinet bases and the wall shelves in the kitchen, so I got to work measuring and marking, and Daniel got to work sawing.


Until we were left with this!


We developed a very sophisticated method of holding the long board straight so that we could screw it into the shorter boards.


And not so very long after, we had these to show for our efforts.


We had deliberately made the base for the wine fridge just a little bit shorter than the other base cabinet, because the wine fridge needs a flat surface for its feet to sit on. We salvaged a 6mm board that we'd pulled out from somewhere else in the house, cut it to size, and nailed it on top, bringing both bases to the same overall height.


It was a tight squeeze, but the wine fridge base slotted into the space next to our new sink cabinet perfectly.


Although we had to remove the top in order to be able to run some electrical wire through the floor so that we would actually be able to have power to the wine fridge. Always handy!


We drilled a similar hole in the top board, and then reattached it.


We checked that its front lined up nicely with the rest of the cabinets so that our future skirting board will sit straight...


And finally the wine fridge got to move into its new home.


Then we moved on to the peninsula base.


We bolted it to the floor with brackets, and then screwed the peninsula cabinet to the top of it. And as simply as that, it was done!


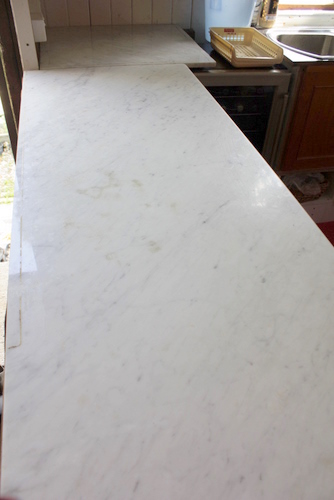
And with our old marble benchtops (the ones that came with the kitchen) back on top, thankfully it's all at the same height now as the other benchtops.


It is so lovely to have my main kitchen work bench at normal height. I'd got used to leaning down to chop vegies when it was resting on the ground. It makes the kitchen feel so much more finished to have it at the right height!


Next step? NEW BENCHTOPS!!!!! I'm so excited.

12 March, 2012

Bed Hacking

In amongst all of our recent sink installing, window moving, footing watching and TV cabinet transforming, we've tried to keep things interesting by tackling a few of the other smaller jobs that have been hanging over our heads.

One of those jobs is our master bed.


We got it for free from a friend of Tom's that was moving interstate, and have made do with it since we moved in.

It has two relatively major problems:

1) It is a queen size bed, but we have a king mattress. So to make it work, we've had our king mattress perched on top of the queen mattress, leaving some of the king mattress hanging over each side, which definitely speeds up the process of sliding out of bed in the morning!


2) The other problem is that because there is a window seat built in underneath that window, it hasn't been possible to push the bed all the way into that space, so it has left an empty space behind the head of the bed that usually fills up with cushions and dust.


Here's a view of that window seat without the bed in the way, while we were in the process of painting.


Because most king size bed frames are a bit too wide for that window space (even though the king mattress itself fits in there nicely), we decided to work with the queen frame rather than simply buying something new. So we dismantled the bed, and took the various pieces down to the shed for some further dismantling.


I have never been much of a fan of the fence-paling style bed head and end, so we decided to simplify things a bit. Tom brought out the trusty circular saw...


And pulled apart the essential pieces.


And then put them back together again. But this time with slightly longer legs, so that the mattress will sit higher than the existing window seat.


In the meantime, I scavenged around for some pieces of scrap timber that we could use to attach to the sides of the bed, to extend its overall width (and give the mattress a bit more support so it stops drooping on the edges).


Of course all of this happened during one of the biggest downpours Brisbane has seen for a while, so whenever we needed to pop into the house to take measurements or collect a tool we'd left inside, we'd get drenched.


We forged on, though. Tom attached the timber I'd found to the outside edge of each of the bed sides, and then screwed a VJ board on top of that, creating a wider, flat surface.


We also had to bump up the height of the inside of each side piece so that the bed slats would sit at the same level as the side piece and our VJ board extension. Does that make any sense at all? Here's an example.

The VJ is on the left, the thin white piece is the original side of the bed, and then come the slats, with an extra pine piece underneath them. Previously, the mattress would have finished with the end of the slats. Now it has a level surface to rest on all the way to the edge of the VJ. Don't worry about the black board in this picture. It was just there temporarily to act as a stable platform for us to stand on while we worked on another project.


Here's another example of our width extender on the other side of the bed. It's turned out to be the perfect width for the king size mattress!


Unfortunately my photo-taking of this whole process was not particularly great. In fact I entirely missed getting any photos of what we did with the window seat. We decided to remove the window seat lid and cut two bed-leg-sized holes in it. So now the legs slot into the window seat nicely, meaning it now squishes into the window nook properly, totally eliminating the gap. Now I have to find a new home for my cushions!

The alterations have definitely left the bed looking a little less finished (i.e. painted), so it will probably need some more attention from me in the future if I want it to look less home-made.


But then again, I do plan to bring in a nice little bed skirt to cover it up from mattress down (perhaps when I finally unpack those horrible boxes that are shielding the base of the bed from sight right now!), so maybe there isn't any point painting the bed if it's all going to be hidden anyway.


While I'm really enjoying knowing that I'm less likely to accidentally slide off the side of the bed in the middle of the night, the really dramatic (and slightly surprising) change is how much more spacious the entire room now feels! The space at the end of the bed has obviously increased by the depth of the window seat, which is probably only about 400mm, but it feels like we've gained so much more!

09 March, 2012

It's Sinkin' Good

Earlier this week I told you the story of our slightly demoralising (for its deja-vu-ness), but ultimately worthwhile kitchen window relocation (see here).


Not only does it make much more sense to have the window kind of centred in that wall, there was another reason.

It was this guy.


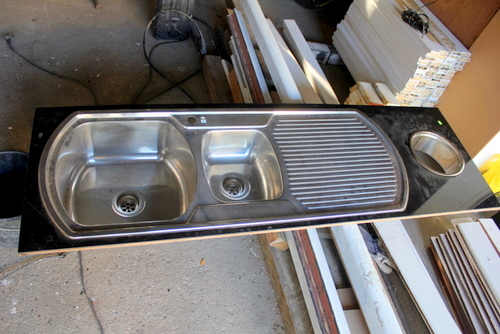
He's a never-used display kitchen sink, and I found him on Gumtree for $100. Which is particularly satisfying given that he still has a sticker attached with the price that "Carmel" was paying for him - $833.80. I'll take a $733.80 discount on a brand new Clark brand sink any day!


Back when we banished our beloved hutch (the first piece of furniture we bought as a couple) from the kitchen (and from our lives), his spot was quickly taken by our dishwasher and the big farmhouse sink that came with the second-hand kitchen cabinets that we bought. Now with "Carmel" on the scene, it made a lot of sense to reposition the window so that it would sit centred off our kitchen tap.


Of course we could have simply used the farmhouse sink that we already had. It was in pretty good condition, and would look absolutely perfect in a country-style kitchen, but it didn't really fit with the aesthetic that we had in mind for our new kitchen. So unfortunately for it, it had to come out.

Tom dove into the cabinet and removed the drainage plumbing from underneath the sink...


And we moved the farmhouse sink outside to be cleaned and photographed for sale on Ebay. Which earned us a tidy $360 (including delivery to the Gold Coast), by the way. Not bad!


So then we were left sinkless. We filled up a few buckets of water at the looking-a-bit strange spindly taps before Tom turned off the water at the main.


And then we moved out the sink cabinet, which allowed us free access to relocate the window properly.


With the window in its new home (and the wall boards replaced), we moved the old sink cabinet back in, and trialed Carmel in pride of place. It's quite handy that her past role as a display kitchen sink means that she's (notice she's changed sex somewhere along the way as well?) already sitting in a board that can act as a makeshift bench around the sink, until we get ourselves fancy new benchtops for the kitchen.


This is the point at which I got very excited. A new kitchen sink in front of our new kitchen window! Woohoo!


You may have noticed a slight problem with that picture, though. Because the front of the old farmhouse sink was designed to be entirely visible, the under-sink cabinet was deliberately a lot shorter than all of the other kitchen cabinets. Meaning that now, with a sink that's designed to be hidden within the cabinet, we've got a gap to fill somehow.


I thought and thought about what we could do to make that extra space fit in with the rest of the kitchen and look nice and deliberate. I considered having a little recessed nook where we could hang paper towels and dish cloths. But then I thought that it's probably the worst place for those things, since it's not uncommon for water to drip down from the sink if someone rinses something a bit too enthusiastically, and soggy paper towels are never fun.

And then I had a brainwave! Instead of building in something at the top of the short cabinet, we could instead build in some shelves at the bottom where I could store baskets of potatoes and onions!

So we drew an extremely technical plan (the things that look like udders on the left are sinks, just thought you might like that clarified)...


And yet again, my obliging husband got to work. First step was cutting off a bit of extra timber from the existing cabinet to make it a nice flat surface.


And then he built what we now affectionately call "The Basket Case", because we needed a way to refer to it (as the future home of baskets containing potatoes) so we understood what the other person was referring to when we talked about it. No in-progress shots, I'm afraid. Its design is simple enough, although it takes a ridiculous amount of time to construct something like this. Much more than it should! Lots of measuring and checking and re-measuring and checking and cutting and re-measuring and checking... you get the idea.


We made sure that there was a cut-out area at the back for all of the plumbing bits and pieces...


And Tom tested its ability to bear weight...


And then we carefully lifted the sink cabinet on top. It fits perfectly! And brings that cabinet up to exactly the right height to match all the rest of our cabinets!


And then we slotted Carmel in on top! Thank goodness the sink cabinet is just wide enough for Carmel's two bowls to fit inside it, or we would have been in trouble.


Then came the really fun part. Plumbing. This is where we discovered that the big sink bowl took up most of the depth of the sink cabinet, meaning that we couldn't fit a traditional S-bend drain pipe underneath it.

I toddled off to Bunnings in search of something that would be a bit shallower but still perform the same job as a normal S-bend. And thankfully I found this option!


It leaves just less than four fingers' distance to the bottom of the cabinet.


But it works! And that's all that matters!


The final icing on the cake for our new sink was a new tap. We splurged a little bit on a decent quality (but still simple) one for about $200 from The Builders Warehouse, and compared with the under-sink plumbing, the installation process for it was pretty darn simple!


Easy for me to say of course, my job consisted of turning it on when we were done. Ah the wonder of running water!


Every time I use that tap I'm so relieved that we finally have a proper kitchen sink arrangement, not two old outdoor taps sticking up in mid-air! This renovation process has certainly taught me to be grateful for the simple things in life like running water, electricity and a working gas stove top!

Related Posts Plugin for WordPress, Blogger...