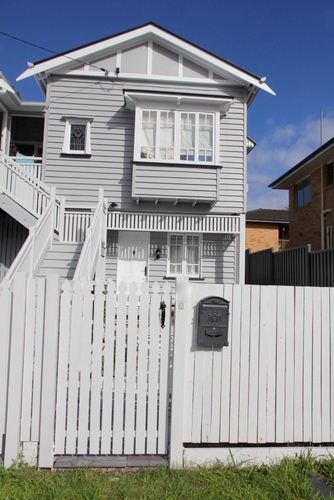
We really need to address the fact that our little wire dividing fence requires a combat roll in order to actually enter the downstairs front yard, and even that access will disappear when we install a couple of rails at the bottom there.
So... how to solve that problem?
Well, fortunately we were clever enough to plan ahead when we first built our front fence. See how there are two posts very close together on the right end in this photo? Well our current front gate is to the right of that right post. The future downstairs front gate is to replace the fence palings between the second close-together post and the next one over to the left.
This shot when we had temporarily removed the big fence panel displays it better. The two gate spaces are easily visible, with the little tiny bit of fence panel between them, where the dividing fence joins the front fence.
So what to do? We didn't have any spare fence palings leftover to make a second gate, and the existing gate wasn't made with the original fence palings anyway. It was one we bought cheaply on Gumtree and just painted white. So, in the interests of getting some symmetry, we decided to make two brand new gates that would look exactly the same.
And we decided on pickets!
Which I painstakingly painted white (actually they look white, but they're really 1/8th strength Gunnard Grey). We went with pickets because I have a plan to one day re-build this fence. When we first built it we just recycled the old timber battens that used to live underneath the house, so all of the palings are a bit too twisted and warped for my liking.
We managed to find another steel gate on Gumtree that was roughly the right frame size, and we recycled the steel frame on the existing front gate, so we had two. Then, Tom got to work screwing all of the palings into the steel frame, with his trusty supervisor looking on closely.
Although her supervision became a little disruptive when she decided that it was time to play ball with her hardly-recognisable rope toy.
Which she then supervised very closely as it got itself wrapped around Tom's drill.
Love that girl. Anyway! Despite the interruptions, Tom did manage to get both gates completed, and then it was time for installation!
And voila! Magic! Two matching gates!
And the view from the other side of the upstairs gate...
And the view of the other new downstairs gate...
Not bad, huh?
For now, although I think I still plan to replace the flat-topped fence palings with pickets in the future, I quite like the fact that the gates look different from the rest of the fence.
So that's that! The downstairs area of the front yard is now officially accessible! I think I can even comfortably call it finished! Woohoo!
Wait a minute, does this mean that the entire downstairs area is complete? I'm going to say yes! Although there is one more gate-building exercise we need to go through in order to enclose the two garage spaces, and of course there is no shortage of jobs remaining upstairs... stay tuned!


The things we have to do when renovating hey, there is no way you'd get me rolling under that fence haah. Great job in the end as always :D
ReplyDeleteThanks Michelle!
Delete