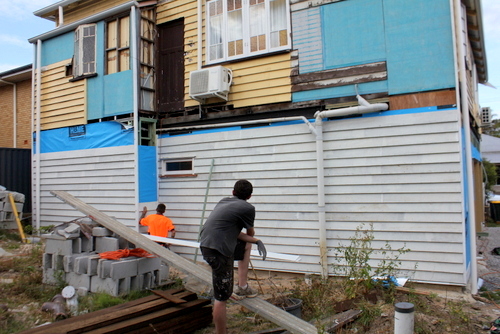
The obvious next step for our all-wrapped-up-in-blue-foil house was for the external cladding to go on. Namely, weatherboards!
The builder and I decided to get proper hardwood weatherboards instead of cheating and going for a modern fabricated board that simulates weatherboards, because the clean straight lines of the newer man-made version would probably look too perfect directly beneath all of the existing not-perfect timber boards on the house.
So we ordered 900 linear metres of them, and I got very excited when the crane truck arrived to deposit them in the backyard. Thus the Instagram shot...
But my excitement was a little shortlived. It didn't take long to discover three things:
1) That 900 linear metres of weatherboards means LOTS of weatherboards.
2) That all of the boards were covered in wet, gunky sawdust. So because two boards were always sandwiched together in the pile (wet, sawdusty side inwards), they hadn't had a chance to dry out.
3) That all of the boards should ideally be primed, both sides, before fixing them to the house, so that they would be nice and sealed and there would be no chance of seepage of anything.
And so began my extreeeemely slow torture by weatherboard. Because, having just paid my builder's first invoice, I was in no mood to pay anyone to stand there for hours on end scraping sawdust and painting the things when I could do it, so do it I did.
I eventually developed a system where I would lay out a batch of to-be-painted boards sawdust side upwards in the yard to dry out.
Meanwhile, I would use a flat shovel to scrape off all of the sawdust, then brushed off the excess sawdust with a little brush.
And then I used a mini roller to roll on that primer. Board after board after board.
A batch of about 8-10 boards would take me about 1.5 hours. So by spending every morning before work and with a concerted effort by Daniel and I over the course of a full weekend, we managed to get the bulk of the boards painted.
I don't think I'd be upset if I never saw another weatherboard.
But at least then we finally got to start seeing the fruit of our labours as the carpenters started attaching them to the house! The back...
The side...
Around the garage door openings...
The other side...
That same other side a bit later... Daniel chipped in to help them for a couple of days when he wasn't working, as it sped up the process considerably having a third pair of hands.
When we reached this point it had to be one of the most exciting moments to date for me. It looks like a real house!
I also celebrated the moment with an Instagram shot from the stairs.
So that got the lower layer of weatherboards on the bulk of the house. Next it was time to move up to the second storey, which was looking like a crazy patchwork still, with the pieces of blue board up there that Tom's brother and I had installed for a bit of weather protection.
The blue board got replaced by more foil wrap.. equally unattractive.
But not before the blue board came down and I got to enjoy my extremely open air laundry from inside once again!
How's this for a before and after of the back of the kitchen?
Even with just the kitchen section fully weatherboarded we were seeing a major improvement!
And now, a streamlined, weatherboarded picture of perfection! Well nearly. There's a bit more work to do to tidy up the plumbing and that ugly black steel beam running along the back wall that's sticking out from the line of the weatherboards.
But we now have a proper timber two-storey house! Hooray! It's amazing how much you can achieve when you pay people to do the hard yakka, huh?


No comments:
Post a Comment