DIY Explanation

pour améliorer, meaning 'to improve', is a humble record of our renovation, home improvement and landscaping projects, with our travel adventures thrown in.

23 January, 2012

They Will Not Beat Me!

Machines are not our friends. We're doing our best to remember that since our most recent run-in with the Bobcat that Broke. And of course the long line of machines before that that tried to beat us. The precious paint sprayer, the possessed first digger, the second borrowed digger, the trilogy of concrete cutters and the pitiful concrete mixer to name a few.

But here's the problem. When they work, they make life so much easier!!!!

Last year, after we returned from our trip to Europe, I expressed a desire to get a sewing machine and to learn to sew. We found one for a good price online, and it arrived in record time. And then sat in its box for months.

Not only were we a bit busy building bathrooms, stairs and fences, giving me plenty of excuses to procrastinate, but the fact of the matter is that this sewing machine intimidated the hell out of me. Power drills? No problem! Cold showers? Sure. Climbing into muddy holes up to my shoulder? Yes please!

But a sewing machine? Scary!


Doesn't it look menacing? You can almost hear it growling at me.

And of course, given our history with machines in general, my intimidation at trying to figure out how to use it without spearing my finger with the needle was combined with a fair share of terror that something awful would go wrong and I'd somehow blow up the house.

But this weekend I conquered it!

I'll pause for your round of applause, here.

I decided to start with a project that's been long overdue. See our lovely shower curtains that we installed in our bathroom?


Well they don't have very much reinforcement around the holes where the curtain rings hook through, so with constant use, the rings holding up the curtain on the right (the one that gets opened and closed every time someone gets in or out of the shower) had ripped completely through most of the original holes. We tried to temporarily fix the problem by simply punching new holes in a different spot which worked for a while, but we had a very sad and sorry droopy shower curtain situation happening most of the time.

Unfortunately I wasn't smart enough to actually take a photo of this droopiness, but here's a picture of the curtain on the other side that doesn't get as much use. You can see it's still straining on its curtain rings a bit too, so it may need attention in the future. One thing at a time, though!


I took myself off to Spotlight to see what I could find in the way of some kind of material to sew over the top section to give it a bit more strength. I wanted something that would be a little bit transparent so it didn't have too much visual weight at the top of the curtain, which is transparent itself. And I found this stuff! Sew-in Interfacing. It has just the right level of transparency, and seems quite strong.


I cut a section and folded it over a couple of times so that I could have doubled-over layers of the interfacing along the top of each side of the curtain.


Meanwhile, that sewing machine glared at me from across the table, just waiting to pounce on me when I dared to use it.


I decided to raid my stationery supplies for some bulldog clips to temporarily attach the interfacing to the curtain in favour of pinning, since I didn't like the idea of pushing pins through the plastic of the curtain. The clips didn't hold very strongly, but it was enough to at least keep the various pieces together until I could sew them together.


And then came the moment of truth! Time to set the machine lose!


And it wasn't too bad! Definitely nowhere even remotely close to perfect stitching, but it was doing the job ok!


 So I repeated with another line of stitching.


I'm definitely not going to win any awards for being able to sew straight, but I'm not going to complain. It's early days yet.


So once I had my rows of extremely wonky stitching, it was time to get to the question of punching holes for the curtain rings. In my trip to Spotlight I'd also invested in a little Eyelet Kit.


These are my kind of instructions. 1) Cut hole. 2) Insert & Punch Eyelet. Love it.


So I did! I found a hammer and a bit of scrap timber, and punched away!


And in no time, I had eyelets placed nicely along the top of my curtain.


Which, I must say, look pretty darn schmick! Please ignore the hole in the ceiling. We're still yet to get a light fitting to put there.


The interfacing's slight transparency is definitely a good thing. You can still kind of see the pattern on the shower curtain showing through in the light, which thankfully also makes my wonky lines of stitching almost invisible!


So I think we can say that round one goes to me! Sewing machine: 0.

We'll make a good housewife of me yet!

20 January, 2012

Finishing the Fourth Wall

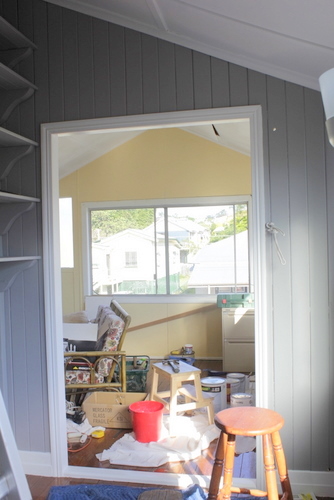
Our fourth wall in our pretty new home office was looking like this after we built it.


But we didn't stop there! In fact, even in that shot above you can see Tom holding up pieces of architrave in place around the doorway.

I nearly gave up hope of being able to match the existing trim in our house with new trim. I tried the demolition yards and Bunnings without finding anything that even remotely resembled our stuff, and eventually I made my way to Finlaysons, a fancy timber yard. The very friendly salesperson there went searching for a matching option for me, and we were just about to give up when I spotted one up high that might just work. As it turns out, it was perfect!

We have actually saved some of the trim we've removed from other doorways in the house to reuse, but we've earmarked it for other purposes, so our new office doorway needed new trim for both sides.


It's amazing how much prettier a doorway looks with the architrave/trim around it!


We decided to pop screws into the deepest valley in the trim, thinking they'll be the easiest to putty over and disguise there, with the shadows all of the nearby raised sections cast, which turned out to be a good decision.

Unfortunately I let us down another way. I didn't quite allow enough length in our cuts to handle the 45-degree cut in the corners, so we ended up with a little bit missing on one corner. Darn. Keep reading though, we managed to solve that problem.


We moved on to the other side of the wall, which was looking like this (before the ceiling was painted, obviously).


Before we put the trim on, I gave the wall a good undercoat with the grey undercoat that I accidentally painted the shelves with, hoping that it might be enough that we would only need one coat of actual paint colour over the top of it.


Then came the tricky part. We had to try to create a proper doorstep and doorway on that wall. Fortunately for us, we had a ready-made doorway leading into the lounge to try to copy! I must say, I've never paid that much attention to a doorway in my life before!


And so we created this! Looks pretty simple and easy, doesn't it?! But we discovered that nobody sells pieces of timber that look like this for doorsteps! So we decided to create our own. The doorstep itself is actually made up two pieces of timber. Tom got a wide one to go on the bottom, and cut the corner off one long edge, then sanded it nice and smooth. Looks fantastic, doesn't it! The higher section of the step is a separate piece of timber that we got with one edge already rounded. Combine the two, and voila! A doorstep!


As an added bonus, we realised that the trim we had attached to the door posts that ran straight to the floor (and was a little bit too short on the top angle) actually had to sit on top of the doorstep in order to match the other doorway we were copying. Hooray! Although it did involve the hassle of taking the trim off again, we got to trim a little bit off that top angle to raise it up a bit, which meant we no longer had the missing corner problem!

We (i.e. Tom) screwed the doorstep into position once and for all...


And attached the trim on the inside of the frame.


And we found a piece of timber to put on the inside of the frame for the doors to bump up against. Thank goodness we had the other doorway to copy, or we wouldn't have been able to figure this out! We could only find pieces that were 60mm wide in Bunnings that were also the right depth, so Tom actually cut 5mm off to leave enough room for the doors at the front.


Since I wrote that and it still sounds like gobbledygook, hopefully this little diagram helps explain it a bit better. Our door posts (in black) are 70mm, and on the inside are the VJ wall boards (yellow), which are 20mm, making a total of 90mm. Our doors are 35mm wide, so in order for there still to be enough space for the doors on the outside of the door post, our board on the inside of the frame in green, needed to be 55mm. Nice and neat!

Unfortunately all the various pieces of timber we were attaching together still left a few tiny gaps between them, which of course we couldn't stand. So I attacked the entire doorway with Selleys No More Gaps...


And then gave them a couple of coats of gloss white paint (along with the cornices and trim as well).


I made that sound so easy. Just "gave them a couple of coats"! Actually, that was my very first time attempting to paint trim (without any painters tape) without getting glossy white paint over everything. It involved way too much time climbing up and down a ladder battling with the only angled brush we haven't yet ruined. Here's a tip. Learn from my experience, and GO AND BUY A NEW ANGLED CUTTING IN BRUSH! It makes being neat SO much easier!

Nevertheless, look how pretty!


Then, to finally be able to call the wall finished (although is it finished if the doors aren't on yet?), I gave the wall a coat of paint in the same colour as the other walls (Taubmans Inverness), and it was done!


Thankfully my hope that one coat of paint over the grey undercoat would give us enough coverage was fulfilled, so we still have a bit of paint leftover in the Inverness colour for future touchups. Woohoo!

Doesn't it look lovely with the crisp white trim?


Pretty....


And a last pretty shot looking up from the doorway to both our shelves and our painted cornice! Aahhhhh.


Can you tell we're pretty proud of ourselves?

18 January, 2012

Cooking With Gas

Guess what, ladies and gents?

We are on a domestication roll!!!!

Last week, as you know, we finally pulled our poor dishwasher out of its unemployment slump and let him start fulfilling his life purpose - saving us from handwashing. We couldn't believe it took us so long, with him sitting there unconnected taunting us for over a year.

This week?


That's a working gas stove, people! After over a year of using my grandmother's retro electric frying pan (and a few other appliances) for virtually all cooking, we have finally got our stove working!!!


Unfortunately it isn't a permanent solution, since we've actually just connected it up to a gas bottle that's now sitting in a corner of the kitchen, with this complicated looking connection device.


But it's definitely an improvement! Look at that butter sizzling away!


And just because we can - two frying pans at once!!! Are you astounded at the wonder of it all?!


I honestly don't know how I've survived this long without a stove top, although Mr Electric Frying Pan has done incredibly well. Although he doesn't have a non-stick surface, so everything sticks to it unless we use a protective layer of baking paper, which then slows down the cooking process to a snail's pace. It's not been much fun. I tried to make crepes in it once, and it took me almost an hour, they cooked so slowly!

Now with the gas, I practically just click my fingers and the food is done. Ahh the luxury!

We'll definitely have to work on a more long-term solution for supplying gas to our kitchen now. I don't think I can go back to Mr Frying Pan. We've been kind of dreading dealing with the gas connection ever since we moved in, because it might involve digging up part of our street in order to run a connection from the main gas line on the other side of the road. Sounds expensive.

Or we could just go ordinary gas bottles stored outside the house...

Decisions decisions! More research is in order, so no doubt more gasbagging (haha get it?) to come on the subject later! Oh and for any non-Australians, here's an article that explains what that means.

17 January, 2012

A Little Cover Up

You may have noticed while we were running wire through the ceiling of my home office that the ceiling is pretty ugly.


Those same ceiling boards extend into the verandah/sleepout area, and are threatening to come crashing down at some stage if we don't take action.


In gazing at both ceilings trying to figure out how to make them more attractive without having to completely replace them, I had a brainwave.

This is our lounge room ceiling, just nearby. Please ignore the ugly splotches and peeling paint. We need to pay it some attention too. Butwhat it does have is some thin boards dividing the ceiling into sections, and probably covering seams in the ceiling boards.


I figured we could do the same thing with the office ceiling!

We drew up a plan that would not only cover up the seams between the four boards in the office ceiling, but divide those sections up a bit too. Here's what we came up with.


We measured the exact length that each of our timber pieces would need to be, since we've learned not to assume that anything in this house is perfectly square or straight.


We made a trip to Bunnings and bought ourselves some strips of pine, and cut them to the right lengths.


And pre-drilled where we would screw them into the ceiling, since it's a lot easier to do that when they're at ground-level rather than above your head!


Allie supervised sleepily.


And then came the exciting moment when the first board went up.


And in what seemed like virtually no time, the rest of the boards joined it.


Tom was careful to make sure that each board looked straight once it was up there, by eyeballing it.


And just like that, our ugly ceiling moved up a bit in the world. I won't say it's less ugly yet with the two-tone look, but at least we can't see those horrible seams anymore!


Next came the cornices...


And then it was my turn to putty up all of the screw heads (which we'd deliberately counter-sunk into the timber so they'd be invisible after a bit of puttying).


And then Tom sanded the putty back...


And Daniel started on the undercoat. Already looking loads better with the raw timber disappearing!


We did have one problem. Right near where the wiring for our new chandelier hangs out of the ceiling, the original paint on the ceiling was peeling. You can just see the two splotches where the level of the paint differs in this shot.


A couple of coats of paint didn't help that situation, so I decided that there was nothing for it but to whip out the putty again.


After an undercoat, it looked like this. The dark putty was showing through, meaning it wasn't much of an improvement!


It took three coats of ceiling paint after the undercoat to make it look seamless. Definitely worth the effort, though! I would probably recommend white-coloured putty in future.


And there you have it! Our new and improved home office ceiling!


If you've got eagle eyes, you may have spotted my new chandelier sitting on the top shelf there. Here's a closer look. Can't wait to get him installed!


So how about a before and after?

Before...


After!


Much better!!! We're getting close to a completed room!
Related Posts Plugin for WordPress, Blogger...