For some reason when I think 'Outside the Laundry' in my head I sing it to the tune of 'Under the Boardwalk'.
Well now that I've got that song running around in your head, I'll
welcome you to what we knew as ‘the laundry area’. The area situated behind the garage, next to the laundry and water tank, and in front of the shed. This is what it looked like towards the end of the construction of the house, with our El Cheapo Retaining Wall along the left.
There are two things I want you to note about it at this stage:
- The height of the ground here is equal to the height of the concrete in the garage; and
- The ground itself was made up of a mixture of dirt and roadbase.
The problem? We wanted to pave that area, which as you know, requires a nice thick layer of roadbase as a solid foundation, and then a layer of sand on which to lay the pavers. It didn’t take us too long to realise that we needed to get rid of a significant amount of that dirt in order to have enough depth to prepare for paving (and have the pavers meet up with the level of the concrete in the garage).
No problem you say? Sure, if we hadn’t already hired earthmoving machinery previously and spent a small fortune on it. I put my foot down and said that we weren’t going to spend any more money hiring machinery, and that whatever needed doing we were going to do by hand. There was also the extra problem of having to get rid of the discarded dirt, which was going to have to happen one trailer-load at a time.
So, we found some websites where people advertised for delivery of ‘clean fill’ (i.e. uncontaminated dirt), and began digging.
And kept digging.
And digging and digging and digging and digging.
Allie took to sitting in the pile of sand/dirt that we were removing, as if she was trying to protect it.
This photo gives a good idea of the amount of dirt we got rid of. You can see the ridge of dirt just behind the wheelbarrow. We’d hand-shovelled the entire area up to that point.
The area on the left was to be a garden in the future, so obviously we didn’t want to prepare that area for paving. We barricaded it with star pickets and salvaged doors from Our First House, and relocated our pile of sand into that area.
Allie still protecting her sand.
The height difference.
Tom striking a pose next to one of the many full loads of dirt. As we took loads of crummy dirt away, we brought in loads of deco, which performs the role of both roadbase and sand, to get the area up to the right height again.
Make that several poses.
Allie and I also posing. Allie was actually the one that suggested this photo, since she takes credit for all of the shovelling done.
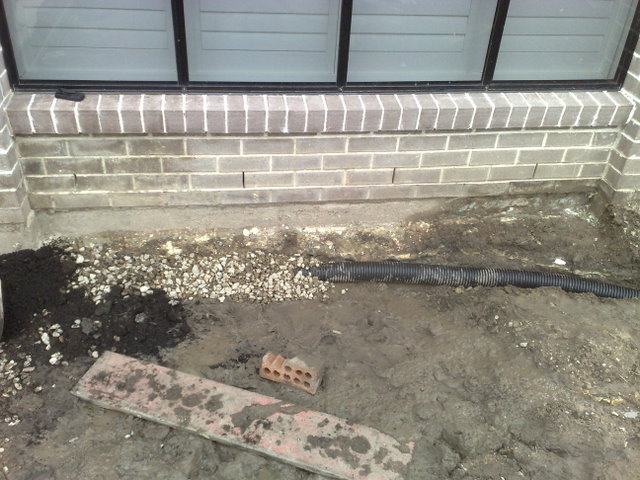
We had a few drainage issues in the area.
All of this digging happened fairly early on in the landscaping process – before we attacked the Front Yard. I can’t remember why we decided that the laundry area was a priority at that stage. We got all of the dirt dug out and replaced it with the deco, and then that was how it remained for almost a year. Then we made the decision to move on to our next house, and we suddenly had a deadline to get the laundry area finished.
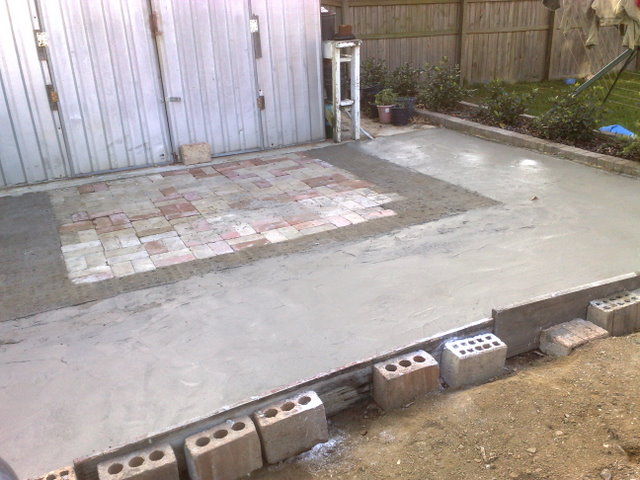
So, we decided to concrete the little area directly in front of the shed.
The patchy area you can see closest to the shed itself is made up of old bricks that we thought would be a good filler.
I had to hang out some washing while the clothesline was displaced, so got inventive.
Tom levelling out the final layer of concrete one night.
Wearing his home-made concrete shoes – plastic bags over bare feet.
Then we got some help in to get the pavers done (because we had to be very careful about the levels to make sure the drainage worked well).
These pavers are just 200mm x 200mm concrete pavers. They were actually one of the first landscaping-related things that we bought for the house, back in 2008. Tom found them second-hand on Ebay for $100. I kid you not, over the course of the construction and landscaping, we moved that darn pile of pavers at least six times! Maybe that’s why we were so keen to get the laundry area sorted out.
Here are Tom and Daniel preparing to concrete in another brick edging for the garden along the El Cheapo Retaining Wall.
Here’s the other side, more edging for a garden in front of the water tank.
We also discovered a mum and baby possum living in the garden shed. Allie wasn’t too keen on them.
The pavers were gapsanded, and then the plants went in, and the area was technically finished! Pardon the unsightly ladder along the right.
It’s very nice to be able to hang clothes out on the washing line without the chorus of “ouch”es associated with stepping on rocks.